React Redux Node MongoDB JWT Authentication Example is the today’s leading topic. We use React and Redux for the frontend, Node.js as a platform, express as a web framework and MongoDB as a NoSQL database. We use JWT authentication where, if the user is logged in then it returns a token and the client saves that token. The client uses that token each time when he tries to access the protected route. So the concept is obvious.
React Redux Node MongoDB JWT Authentication
Now for this project, we need to separate projects.
- React Frontend
- Node Backend
For React Frontend, we can use the create-react-app boilerplate to kick off the frontend project, but for the backend, we need to create the project from scratch.
#1: Create a backend on Node.js.
Now, first, we need to create the main project. So type the following command to create a project.
mkdir jwtauth
Now, go inside that folder.
cd jwtauth
In this folder, we have two more folders. One for backend and one for the frontend.
Create a backend folder.
mkdir backend
Now, go into the folder.
cd backend
Type the following command to initialize the package.json file.
npm init -y
Okay, now we need to install the dependencies. I have installed all the dependencies that will need in this backend project. We will use a passport, passport-jwt, jsonwebtoken for authentication. Mongoose for ORM for MongoDB, the validator for validating the input types, body-parser for parsing the data that comes from request, gravatar for getting avatar image associated with an email address.
yarn add bcryptjs body-parser express gravatar jsonwebtoken mongoose passport passport-jwt validator

# or

npm install --save bcryptjs body-parser express gravatar jsonwebtoken mongoose passport passport-jwt validator
Also, we need to install nodemon for development dependency.
npm install -D nodemon
We need this dependency because when we save our file, we need to restart the node.js server and nodemon does this precisely without stop or restart the server manually.
Okay, now start the mongodb server by the following command.
mongod
If you have not installed then install MongoDB server first and then if possible install the database client like studio3t or use MongoLab to create a database. It has the free version.
#2: Create an app.js file to create the node server.
Inside the backend folder, create one file called app.js and add the following code.
// app.js

const express = require('express');
const mongoose = require('mongoose');
const bodyParser = require('body-parser');
const passport = require('passport');

const app = express();

app.use(bodyParser.urlencoded({ extended: false }));
app.use(bodyParser.json());

app.get('/', function(req, res) {
    res.send('hello');
});

const PORT = process.env.PORT || 5000;

app.listen(PORT, () => {
    console.log(`Server is running on PORT ${PORT}`);
});
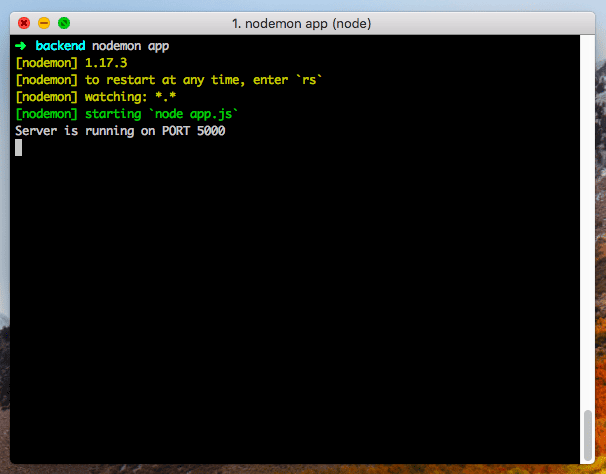
Go to the root of the backend project and open the terminal and type the following command to start the node.js server by using the following command.
nodemon app
It will start the server at port: 5000.
#3: Create a database file called db.js.
Write the following code inside the db.js file.
// db.js

module.exports = {
    DB: 'mongodb://localhost:27017/auth'
}
Include the db.js file inside an app.js file.
// app.js

const express = require('express');
const mongoose = require('mongoose');
const bodyParser = require('body-parser');
const passport = require('passport');
const config = require('./db');

mongoose.connect(config.DB, { useNewUrlParser: true }).then(
    () => {console.log('Database is connected') },
    err => { console.log('Can not connect to the database'+ err)}
);

const app = express();

app.use(bodyParser.urlencoded({ extended: false }));
app.use(bodyParser.json());

app.get('/', function(req, res) {
    res.send('hello');
});

const PORT = process.env.PORT || 5000;

app.listen(PORT, () => {
    console.log(`Server is running on PORT ${PORT}`);
});
Save the file and make sure that your mongodb server is running. So in the console, you can see that Database is connected!!
#4: Create a User model.
Inside the backend folder, create one folder called models and inside that folder, create one file called User.js. Write the following schema inside User.js file.
// User.js

const mongoose = require('mongoose');

const Schema = mongoose.Schema;

const UserSchema = new Schema({
    name: {
        type: String,
        required: true
    },
    email: {
        type: String,
        required: true
    },
    password: {
        type: String,
        required: true
    },
    avatar: {
        type: String
    },
    date: {
        type: Date,
        default: Date.now
    }
});

const User = mongoose.model('users', UserSchema);

module.exports = User;
The name, email, and password come from the React.js form. We fetch the avatar from gravatar based on email address.
#5: Create a validation for input values.
Inside the backend folder, create a folder called validation and inside that, create one file called register.js. But before that, we also need to create one more validation file called is-empty.js inside same validation directory.
// is-empty.js

const isEmpty = (value) => {
    return (
        value === undefined ||
        value === null ||
        (typeof value === 'object' && Object.keys(value).length === 0) ||
        (typeof value === 'string' && value.trim().length === 0)
    );
}
module.exports = isEmpty;
This function will check if the passed value is undefined or null or object or string‘s length is 0.
Write the following code inside the register.js file. For validation, we have used the validator library.
// register.js

const Validator = require('validator');
const isEmpty = require('./is-empty');

module.exports = function validateRegisterInput(data) {
    let errors = {};
    data.name = !isEmpty(data.name) ? data.name : '';
    data.email = !isEmpty(data.email) ? data.email : '';
    data.password = !isEmpty(data.password) ? data.password : '';
    data.password_confirm = !isEmpty(data.password_confirm) ? data.password_confirm : '';

    if(!Validator.isLength(data.name, { min: 2, max: 30 })) {
        errors.name = 'Name must be between 2 to 30 chars';
    }

    if(Validator.isEmpty(data.name)) {
        errors.name = 'Name field is required';
    }

    if(!Validator.isEmail(data.email)) {
        errors.email = 'Email is invalid';
    }

    if(Validator.isEmpty(data.email)) {
        errors.email = 'Email is required';
    }

    if(!Validator.isLength(data.password, {min: 6, max: 30})) {
        errors.password = 'Password must have 6 chars';
    }

    if(Validator.isEmpty(data.password)) {
        errors.password = 'Password is required';
    }

    if(!Validator.isLength(data.password_confirm, {min: 6, max: 30})) {
        errors.password_confirm = 'Password must have 6 chars';
    }

    if(!Validator.equals(data.password, data.password_confirm)) {
        errors.password_confirm = 'Password and Confirm Password must match';
    }

    if(Validator.isEmpty(data.password_confirm)) {
        errors.password_confirm = 'Password is required';
    }

    return {
        errors,
        isValid: isEmpty(errors)
    }
}
Here, I have used validator function to check the input values and based on the values, if the values are empty or not formatted correctly, or length is not defined in the rules then, it fills an error object and sends back to the client.
Here all the input values are checked to see the validation and if it fails then error object will be sent back to the user and display that errors in proper format.
Also same for login form validation. So inside validation folder, create one file called login.js and add the following code.
// login.js

const Validator = require('validator');
const isEmpty = require('./is-empty');

module.exports = function validateLoginInput(data) {
    let errors = {};
    data.email = !isEmpty(data.email) ? data.email : '';
    data.password = !isEmpty(data.password) ? data.password : '';

    if(!Validator.isEmail(data.email)) {
        errors.email = 'Email is invalid';
    }

    if(Validator.isEmpty(data.email)) {
        errors.email = 'Email is required';
    }

    if(!Validator.isLength(data.password, {min: 6, max: 30})) {
        errors.password = 'Password must have 6 chars';
    }

    if(Validator.isEmpty(data.password)) {
        errors.password = 'Password is required';
    }

    return {
        errors,
        isValid: isEmpty(errors)
    }
}
#6: Create routes for register and login.
We are using jwt-authentication, so we need to create a passport’s jwt strategy. So inside the backend folder, we need to create one file called passport.js. Write the following code insidepassport.js.
// passport.js

const JWTStrategy = require('passport-jwt').Strategy;
const ExtractJWT = require('passport-jwt').ExtractJwt;
const mongoose = require('mongoose');
const User = mongoose.model('users');
const opts = {};

opts.jwtFromRequest = ExtractJWT.fromAuthHeaderAsBearerToken();
opts.secretOrKey = 'secret';

module.exports = passport => {
    passport.use(new JWTStrategy(opts, (jwt_payload, done) => {
        User.findById(jwt_payload.id)
            .then(user => {
                if(user) {
                    return done(null, user);
                }
                return done(null, false);
            })
            .catch(err => console.error(err));
    }));
}
Inside the backend folder, create one folder called routes and inside that folder, create one file called user.js and add the following code inside it.
// user.js

const express = require('express');
const router = express.Router();
const gravatar = require('gravatar');
const bcrypt = require('bcryptjs');
const jwt = require('jsonwebtoken');
const passport = require('passport');
const validateRegisterInput = require('../validation/register');
const validateLoginInput = require('../validation/login');

const User = require('../models/User');

router.post('/register', function(req, res) {

    const { errors, isValid } = validateRegisterInput(req.body);

    if(!isValid) {
        return res.status(400).json(errors);
    }
    User.findOne({
        email: req.body.email
    }).then(user => {
        if(user) {
            return res.status(400).json({
                email: 'Email already exists'
            });
        }
        else {
            const avatar = gravatar.url(req.body.email, {
                s: '200',
                r: 'pg',
                d: 'mm'
            });
            const newUser = new User({
                name: req.body.name,
                email: req.body.email,
                password: req.body.password,
                avatar
            });

            bcrypt.genSalt(10, (err, salt) => {
                if(err) console.error('There was an error', err);
                else {
                    bcrypt.hash(newUser.password, salt, (err, hash) => {
                        if(err) console.error('There was an error', err);
                        else {
                            newUser.password = hash;
                            newUser
                                .save()
                                .then(user => {
                                    res.json(user)
                                });
                        }
                    });
                }
            });
        }
    });
});

router.post('/login', (req, res) => {

    const { errors, isValid } = validateLoginInput(req.body);

    if(!isValid) {
        return res.status(400).json(errors);
    }

    const email = req.body.email;
    const password = req.body.password;

    User.findOne({email})
        .then(user => {
            if(!user) {
                errors.email = 'User not found'
                return res.status(404).json(errors);
            }
            bcrypt.compare(password, user.password)
                    .then(isMatch => {
                        if(isMatch) {
                            const payload = {
                                id: user.id,
                                name: user.name,
                                avatar: user.avatar
                            }
                            jwt.sign(payload, 'secret', {
                                expiresIn: 3600
                            }, (err, token) => {
                                if(err) console.error('There is some error in token', err);
                                else {
                                    res.json({
                                        success: true,
                                        token: `Bearer ${token}`
                                    });
                                }
                            });
                        }
                        else {
                            errors.password = 'Incorrect Password';
                            return res.status(400).json(errors);
                        }
                    });
        });
});

router.get('/me', passport.authenticate('jwt', { session: false }), (req, res) => {
    return res.json({
        id: req.user.id,
        name: req.user.name,
        email: req.user.email
    });
});

module.exports = router;
So, here, I have defined the two post routes.
- Register.
- Login.
Inside the post route of the register, we first check the validation for all of our inputs. If the errors exist, then there is no need for the further process. So sent back the error response to the client.
After that, we check, if the email already exists, if so we need to send an error response to the client.
Otherwise, we fetch the avatar based on email address, if an avatar is not there then by default will be sent back as a response.
Then we create a hash value of the password and save the user in the database successfully and send back that user to the client.
Now, for login the user, first, we check the validation same as a register.
Then go for checking the email, and if the email is not found, then we send back the error to the client saying that user is not found.
If email is proper, then we check password with bcrypt’s compare method. If the match is found, then we need to generate the jwt token.
We use the user object as a payload and give a secret key to generate JWT token and send back that token to the user and logged in the user.
Also, I have used get route, and that is /me.
If the user is logged in and it has the jwt token then and then it can access this route otherwise he will redirect back to log in because this route is protected.
Finally, import passport.js file and routes >> user.js file inside backend >> app.js file.
So, our final app.js file looks like below.
// app.js

const express = require('express');
const mongoose = require('mongoose');
const bodyParser = require('body-parser');
const passport = require('passport');
const config = require('./db');

const users = require('./routes/user');

mongoose.connect(config.DB, { useNewUrlParser: true }).then(
    () => {console.log('Database is connected') },
    err => { console.log('Can not connect to the database'+ err)}
);

const app = express();
app.use(passport.initialize());
require('./passport')(passport);

app.use(bodyParser.urlencoded({ extended: false }));
app.use(bodyParser.json());

app.use('/api/users', users);

app.get('/', function(req, res) {
    res.send('hello');
});

const PORT = process.env.PORT || 5000;

app.listen(PORT, () => {
    console.log(`Server is running on PORT ${PORT}`);
});
So, we have completed our backend for this React Redux Node MongoDB JWT Authentication Tutorial. Now, we need to build a frontend using React.js and Redux.
#7: Create React.js project using create-react-app.
For generating the react.js project. We need to go to the root of the jwtauth folder and type the following command.
create-react-app frontend
Now, go to the frontend folder.
cd frontend
Install the dependencies using the following command.
yarn add axios bootstrap classnames jwt-decode react-redux react-router-dom redux redux-thunk

# or

npm install --save axios bootstrap classnames jwt-decode react-redux react-router-dom redux redux-thunk
Now, inside package.json file of the frontend project, we need to add a proxy, so that we can avoid the CORS problem because of its a cross-origin request from frontend to backend. The react.js project will be running on PORT: 3000 and Node.js project will be on the PORT: 5000. So CORS problem will arise. To avoid that, we need to add a proxy. It simulates as one server in which react.js is running, but both are different.
So our final package.json file looks like below.
{
  "name": "frontend",
  "version": "0.1.0",
  "private": true,
  "dependencies": {
    "axios": "^0.18.0",
    "bootstrap": "^4.1.2",
    "classnames": "^2.2.6",
    "jwt-decode": "^2.2.0",
    "react": "^16.4.1",
    "react-dom": "^16.4.1",
    "react-redux": "^5.0.7",
    "react-router-dom": "^4.3.1",
    "react-scripts": "1.1.4",
    "redux": "^4.0.0",
    "redux-thunk": "^2.3.0"
  },
  "scripts": {
    "start": "react-scripts start",
    "build": "react-scripts build",
    "test": "react-scripts test --env=jsdom",
    "eject": "react-scripts eject"
  },
  "proxy": "http://localhost:5000"
}
Here, we have added proxy server to node.js server. So that our api request will look like this.
http://localhost:3000/api/users/register
Although, our primary node server will be running on port:5000. If you try the API in postman, then you have to send a POST request to the following URL.
http://localhost:5000/api/users/register
But, we have added a proxy, so now we can send a post request from the 3000 port and also receive to the 3000 port. Thus, both domains are the same, and we do not face the CORS error.
Import the bootstrap inside src >> App.js file.
// App.js

import React, { Component } from 'react';
import 'bootstrap/dist/css/bootstrap.min.css';

class App extends Component {
  render() {
    return (
      <div>
        React Redux Auth App
      </div>
    );
  }
}

export default App;
Save the file and start the React development server using the following command.
npm start
Inside src folder, create one folder called components and inside that folder, create one file called Navbar.js and add the following code.
// Navbar.js

import React, { Component } from 'react';

class Navbar extends Component {
    render() {
        return(
            <nav class="navbar navbar-expand-lg navbar-light bg-light">
                <a class="navbar-brand" href="#">Redux Auth</a>
                <div class="collapse navbar-collapse" id="navbarSupportedContent">
                    <ul class="navbar-nav ml-auto">
                        <li class="nav-item">
                            <a class="nav-link" href="#">Home</a>
                        </li>
                        <li class="nav-item">
                            <a class="nav-link" href="#">Register</a>
                        </li>
                        <li class="nav-item">
                            <a class="nav-link" href="#">Login</a>
                        </li>
                    </ul>
                </div>
            </nav>
        )
    }
}
export default Navbar;
Import this Navbar.js file inside the App.js file.
// App.js

import React, { Component } from 'react';
import 'bootstrap/dist/css/bootstrap.min.css';
import Navbar from './components/Navbar';

class App extends Component {
  render() {
    return (
      <div>
        <Navbar />
      </div>
    );
  }
}

export default App;
#9: Create a Register component.
Inside src >> components folder, create one component called Register.js and add the following code.
// Register.js

import React, { Component } from 'react';

class Register extends Component {

    constructor() {
        super();
        this.state = {
            name: '',
            email: '',
            password: '',
            password_confirm: '',
            errors: {}
        }
        this.handleInputChange = this.handleInputChange.bind(this);
        this.handleSubmit = this.handleSubmit.bind(this);
    }

    handleInputChange(e) {
        this.setState({
            [e.target.name]: e.target.value
        })
    }

    handleSubmit(e) {
        e.preventDefault();
        const user = {
            name: this.state.name,
            email: this.state.email,
            password: this.state.password,
            password_confirm: this.state.password_confirm
        }
        console.log(user);
    }

    render() {
        return(
        <div className="container" style={{ marginTop: '50px', width: '700px'}}>
            <h2 style={{marginBottom: '40px'}}>Registration</h2>
            <form onSubmit={ this.handleSubmit }>
                <div className="form-group">
                    <input
                    type="text"
                    placeholder="Name"
                    className="form-control"
                    name="name"
                    onChange={ this.handleInputChange }
                    value={ this.state.name }
                    />
                </div>
                <div className="form-group">
                    <input
                    type="email"
                    placeholder="Email"
                    className="form-control"
                    name="email"
                    onChange={ this.handleInputChange }
                    value={ this.state.email }
                    />
                </div>
                <div className="form-group">
                    <input
                    type="password"
                    placeholder="Password"
                    className="form-control"
                    name="password"
                    onChange={ this.handleInputChange }
                    value={ this.state.password }
                    />
                </div>
                <div className="form-group">
                    <input
                    type="password"
                    placeholder="Confirm Password"
                    className="form-control"
                    name="password_confirm"
                    onChange={ this.handleInputChange }
                    value={ this.state.password_confirm }
                    />
                </div>
                <div className="form-group">
                    <button type="submit" className="btn btn-primary">
                        Register User
                    </button>
                </div>
            </form>
        </div>
        )
    }
}

export default Register;
Okay, so when now fill all the textbox values and hit the Register button, you can see that, we got all the values inside out console of the browser.
Same we can create a Login component inside components folder. Add the following code inside Login.js file.
// Login.js

import React, { Component } from 'react';

class Login extends Component {

    constructor() {
        super();
        this.state = {
            email: '',
            password: '',
            errors: {}
        }
        this.handleInputChange = this.handleInputChange.bind(this);
        this.handleSubmit = this.handleSubmit.bind(this);
    }

    handleInputChange(e) {
        this.setState({
            [e.target.name]: e.target.value
        })
    }

    handleSubmit(e) {
        e.preventDefault();
        const user = {
            email: this.state.email,
            password: this.state.password,
        }
        console.log(user);
    }

    render() {
        return(
        <div className="container" style={{ marginTop: '50px', width: '700px'}}>
            <h2 style={{marginBottom: '40px'}}>Login</h2>
            <form onSubmit={ this.handleSubmit }>
                <div className="form-group">
                    <input
                    type="email"
                    placeholder="Email"
                    className="form-control"
                    name="email"
                    onChange={ this.handleInputChange }
                    value={ this.state.email }
                    />
                </div>
                <div className="form-group">
                    <input
                    type="password"
                    placeholder="Password"
                    className="form-control"
                    name="password"
                    onChange={ this.handleInputChange }
                    value={ this.state.password }
                    />
                </div>
                <div className="form-group">
                    <button type="submit" className="btn btn-primary">
                        Login User
                    </button>
                </div>
            </form>
        </div>
        )
    }
}

export default Login;
#10: Setup the React Router.
We forget to create one component called Home. So let us create inside the components folder.
// Home.js

import React, { Component } from 'react';

export default class Home extends Component {
    render() {
        return (
            <div>
                Home Component
            </div>
        );
    }
}
Inside the src >> App.js file add the following code.
// App.js

import React, { Component } from 'react';
import { BrowserRouter as Router, Route } from 'react-router-dom';

import Navbar from './components/Navbar';
import Register from './components/Register';
import Login from './components/Login';
import Home from './components/Home';

import 'bootstrap/dist/css/bootstrap.min.css';

class App extends Component {
  render() {
    return (
      <Router>
          <div>
            <Navbar />
              <Route exact path="/" component={ Home } />
              <div className="container">
                <Route exact path="/register" component={ Register } />
                <Route exact path="/login" component={ Login } />
              </div>
          </div>
        </Router>
    );
  }
}

export default App;
Also, we need to add the Link to the components >> Navbar.js file.
// Navbar.js

import React, { Component } from 'react';
import { Link } from 'react-router-dom';

class Navbar extends Component {
    render() {
        return(
            <nav className="navbar navbar-expand-lg navbar-light bg-light">
                <Link className="navbar-brand" to="/">Redux Node Auth</Link>
                <div className="collapse navbar-collapse" id="navbarSupportedContent">
                    <ul className="navbar-nav ml-auto">
                        <li className="nav-item">
                            <Link className="nav-link" to="/register">Sign Up</Link>
                        </li>
                        <li className="nav-item">
                            <Link className="nav-link" to="/login">Sign Up</Link>
                        </li>
                        <li className="nav-item">
                            <Link className="nav-link" to="/">Home</Link>
                        </li>
                    </ul>
                </div>
            </nav>
        )
    }
}
export default Navbar;
Now, we can navigate through different links using React Router.
#11: Setup a Redux Store.
Inside the src folder, create two folders.
- actions
- reducers
Inside reducers folder, create one file called index.js and add the following code in it.
// index.js

import { combineReducers } from 'redux';

export default combineReducers({

});
Right now, we do not have any reducers. But we will have reducer files in the future.
Inside the src folder, create one file called store.js and add the following code in it.
// store.js

import { createStore, applyMiddleware, compose } from 'redux';
import thunk from 'redux-thunk';
import rootReducer from './reducers';

const inititalState = {};

const store = createStore(
        rootReducer,
        inititalState,
        compose(applyMiddleware(thunk),
                window.__REDUX_DEVTOOLS_EXTENSION__&& window.__REDUX_DEVTOOLS_EXTENSION__()));

export default store;
Here, we have used redux-thunk middleware to deal with AJAX or network request through redux.
Also, I have used the compose function. We have used a chrome extension to display our store data in that extension. So we have connected our Redux application to that extension.
Now we need to pass this store into our React application. So modify the src >> App.js file with the following code.
// App.js

import React, { Component } from 'react';
import { BrowserRouter as Router, Route } from 'react-router-dom';
import { Provider } from 'react-redux';
import store from './store';

import Navbar from './components/Navbar';
import Register from './components/Register';
import Login from './components/Login';
import Home from './components/Home';

import 'bootstrap/dist/css/bootstrap.min.css';

class App extends Component {
  render() {
    return (
      <Provider store = { store }>
        <Router>
            <div>
              <Navbar />
                <Route exact path="/" component={ Home } />
                <div className="container">
                  <Route exact path="/register" component={ Register } />
                  <Route exact path="/login" component={ Login } />
                </div>
            </div>
          </Router>
        </Provider>
    );
  }
}

export default App;
#12: Create actions.
We create two actions throughout our project.
- GET_ERRORS
- SET_CURRENT_USER
So inside actions folder, create one file called types.js and add the following code in it.
// types.js

export const GET_ERRORS = 'GET_ERRORS';
export const SET_CURRENT_USER = 'SET_CURRENT_USER';
Also, inside actions folder, create one file called authentication.js and add the following code.
Write the following code inside an authentication.js file.
// authentication.js

import axios from 'axios';
import { GET_ERRORS } from './types';

export const registerUser = (user, history) => dispatch => {
    axios.post('/api/users/register', user)
            .then(res => history.push('/login'))
            .catch(err => {
                dispatch({
                    type: GET_ERRORS,
                    payload: err.response.data
                });
            });
}

export const loginUser = (user) => dispatch => {
    axios.post('/api/users/login', user)
            .then(res => {
                console.log(res.data);
            })
            .catch(err => {
                dispatch({
                    type: GET_ERRORS,
                    payload: err.response.data
                });
            });
}
So, from this file, we will send an AJAX request to the node.js server. We can not write this code inside Reducer because otherwise, it is a violation of pure function. So we need to write any database operations from actions.
If we get any errors, then we dispatch the actions and reducer will handle that for us.
#13: Create reducers.
Inside reducers folder, create one file called errorReducer.js and add the following code.
// errorReducer.js

import { GET_ERRORS } from '../actions/types';

const initialState = {};

export default function(state = initialState, action ) {
    switch(action.type) {
        case GET_ERRORS:
            return action.payload;
        default:
            return state;
    }
}
If any errors occur then this reducer fill the state with errors and we can display that errors from the frontend. Now, import this errorReducer.js file inside reducers >> index.js file.
// index.js

import { combineReducers } from 'redux';
import errorReducer from './errorReducer';

export default combineReducers({
    errors: errorReducer
});
#14: Create a validation.
Inside src folder, create one file called is-empty.js and add the following code in it.
// is-empty.js

const isEmpty = (value) => {
    return (
        value === undefined ||
        value === null ||
        (typeof value === 'object' && Object.keys(value).length === 0) ||
        (typeof value === 'string' && value.trim().length === 0)
    );
}
export default isEmpty;
We need this file when we check whether the user is authenticated or not.
#15: Connect Register component to Redux store.
Okay, so now it’s time to connect our Register.js file to the Redux store. For that, we use theconnect method provided by react-redux.
// Register.js

import React, { Component } from 'react';
import { connect } from 'react-redux';
import PropTypes from 'prop-types';
import { withRouter } from 'react-router-dom';
import { registerUser } from '../actions/authentication';

class Register extends Component {

    constructor() {
        super();
        this.state = {
            name: '',
            email: '',
            password: '',
            password_confirm: '',
            errors: {}
        }
        this.handleInputChange = this.handleInputChange.bind(this);
        this.handleSubmit = this.handleSubmit.bind(this);
    }

    handleInputChange(e) {
        this.setState({
            [e.target.name]: e.target.value
        })
    }

    handleSubmit(e) {
        e.preventDefault();
        const user = {
            name: this.state.name,
            email: this.state.email,
            password: this.state.password,
            password_confirm: this.state.password_confirm
        }
        this.props.registerUser(user, this.props.history);
    }

    componentWillReceiveProps(nextProps) {
        if(nextProps.errors) {
            this.setState({
                errors: nextProps.errors
            });
        }
    }

    render() {
        return(
        <div className="container" style={{ marginTop: '50px', width: '700px'}}>
            <h2 style={{marginBottom: '40px'}}>Registration</h2>
            <form onSubmit={ this.handleSubmit }>
                <div className="form-group">
                    <input
                    type="text"
                    placeholder="Name"
                    className="form-control"
                    name="name"
                    onChange={ this.handleInputChange }
                    value={ this.state.name }
                    />
                </div>
                <div className="form-group">
                    <input
                    type="email"
                    placeholder="Email"
                    className="form-control"
                    name="email"
                    onChange={ this.handleInputChange }
                    value={ this.state.email }
                    />
                </div>
                <div className="form-group">
                    <input
                    type="password"
                    placeholder="Password"
                    className="form-control"
                    name="password"
                    onChange={ this.handleInputChange }
                    value={ this.state.password }
                    />
                </div>
                <div className="form-group">
                    <input
                    type="password"
                    placeholder="Confirm Password"
                    className="form-control"
                    name="password_confirm"
                    onChange={ this.handleInputChange }
                    value={ this.state.password_confirm }
                    />
                </div>
                <div className="form-group">
                    <button type="submit" className="btn btn-primary">
                        Register User
                    </button>
                </div>
            </form>
        </div>
        )
    }
}

Register.propTypes = {
    registerUser: PropTypes.func.isRequired,
};

const mapStateToProps = state => ({
    errors: state.errors
});

export default connect(mapStateToProps,{ registerUser })(withRouter(Register))
Now, register the user with the empty value and analyze the console. You can see that its 400 Bad Request because we are getting errors. We need to figure it somehow out how we can display the errors.
#16: Display the Validation errors.
We have already installed the module called classnames. We just need to render conditional errors. So we can write the Register.js file like below.
// Register.js

import React, { Component } from 'react';
import { connect } from 'react-redux';
import PropTypes from 'prop-types';
import { withRouter } from 'react-router-dom';
import { registerUser } from '../actions/authentication';
import classnames from 'classnames';

class Register extends Component {

    constructor() {
        super();
        this.state = {
            name: '',
            email: '',
            password: '',
            password_confirm: '',
            errors: {}
        }
        this.handleInputChange = this.handleInputChange.bind(this);
        this.handleSubmit = this.handleSubmit.bind(this);
    }

    handleInputChange(e) {
        this.setState({
            [e.target.name]: e.target.value
        })
    }

    handleSubmit(e) {
        e.preventDefault();
        const user = {
            name: this.state.name,
            email: this.state.email,
            password: this.state.password,
            password_confirm: this.state.password_confirm
        }
        this.props.registerUser(user, this.props.history);
    }

    componentWillReceiveProps(nextProps) {
        if(nextProps.errors) {
            this.setState({
                errors: nextProps.errors
            });
        }
    }

    render() {
        const { errors } = this.state;
        return(
        <div className="container" style={{ marginTop: '50px', width: '700px'}}>
            <h2 style={{marginBottom: '40px'}}>Registration</h2>
            <form onSubmit={ this.handleSubmit }>
                <div className="form-group">
                    <input
                    type="text"
                    placeholder="Name"
                    className={classnames('form-control form-control-lg', {
                        'is-invalid': errors.name
                    })}
                    name="name"
                    onChange={ this.handleInputChange }
                    value={ this.state.name }
                    />
                    {errors.name && (<div className="invalid-feedback">{errors.name}</div>)}
                </div>
                <div className="form-group">
                    <input
                    type="email"
                    placeholder="Email"
                    className={classnames('form-control form-control-lg', {
                        'is-invalid': errors.email
                    })}
                    name="email"
                    onChange={ this.handleInputChange }
                    value={ this.state.email }
                    />
                    {errors.email && (<div className="invalid-feedback">{errors.email}</div>)}
                </div>
                <div className="form-group">
                    <input
                    type="password"
                    placeholder="Password"
                    className={classnames('form-control form-control-lg', {
                        'is-invalid': errors.password
                    })}
                    name="password"
                    onChange={ this.handleInputChange }
                    value={ this.state.password }
                    />
                    {errors.password && (<div className="invalid-feedback">{errors.password}</div>)}
                </div>
                <div className="form-group">
                    <input
                    type="password"
                    placeholder="Confirm Password"
                    className={classnames('form-control form-control-lg', {
                        'is-invalid': errors.password_confirm
                    })}
                    name="password_confirm"
                    onChange={ this.handleInputChange }
                    value={ this.state.password_confirm }
                    />
                    {errors.password_confirm && (<div className="invalid-feedback">{errors.password_confirm}</div>)}
                </div>
                <div className="form-group">
                    <button type="submit" className="btn btn-primary">
                        Register User
                    </button>
                </div>
            </form>
        </div>
        )
    }
}

Register.propTypes = {
    registerUser: PropTypes.func.isRequired,
};

const mapStateToProps = state => ({
    errors: state.errors
});

export default connect(mapStateToProps,{ registerUser })(withRouter(Register))
We can see the errors like below image.

If all of the values of the input box is right and valid then we can be able to sign up and redirect to login page.
#17: Connect Login component to Redux Store.
Edit the Login.js file with the following code.
// Login.js

import React, { Component } from 'react';
import PropTypes from 'prop-types';
import { connect } from 'react-redux';
import { loginUser } from '../actions/authentication';

class Login extends Component {

    constructor() {
        super();
        this.state = {
            email: '',
            password: '',
            errors: {}
        }
        this.handleInputChange = this.handleInputChange.bind(this);
        this.handleSubmit = this.handleSubmit.bind(this);
    }

    handleInputChange(e) {
        this.setState({
            [e.target.name]: e.target.value
        })
    }

    handleSubmit(e) {
        e.preventDefault();
        const user = {
            email: this.state.email,
            password: this.state.password,
        }
        this.props.loginUser(user);
    }

    componentWillReceiveProps(nextProps) {

        if(nextProps.errors) {
            this.setState({
                errors: nextProps.errors
            });
        }
    }

    render() {
        return(
        <div className="container" style={{ marginTop: '50px', width: '700px'}}>
            <h2 style={{marginBottom: '40px'}}>Login</h2>
            <form onSubmit={ this.handleSubmit }>
                <div className="form-group">
                    <input
                    type="email"
                    placeholder="Email"
                    className="form-control"
                    name="email"
                    onChange={ this.handleInputChange }
                    value={ this.state.email }
                    />
                </div>
                <div className="form-group">
                    <input
                    type="password"
                    placeholder="Password"
                    className="form-control"
                    name="password"
                    onChange={ this.handleInputChange }
                    value={ this.state.password }
                    />
                </div>
                <div className="form-group">
                    <button type="submit" className="btn btn-primary">
                        Login User
                    </button>
                </div>
            </form>
        </div>
        )
    }
}

Login.propTypes = {
    errors: PropTypes.object.isRequired
}

const mapStateToProps = (state) => ({
    errors: state.errors
})

export  default connect(mapStateToProps, { loginUser })(Login)
Now, try to login the user with the empty values and analyze the console. You can see that its400 Bad Request because we are getting errors. We use same classnames module to display the errors.
So edit the Login.js component with the following code.
// Login.js

import React, { Component } from 'react';
import PropTypes from 'prop-types';
import { connect } from 'react-redux';
import { loginUser } from '../actions/authentication';
import classnames from 'classnames';

class Login extends Component {

    constructor() {
        super();
        this.state = {
            email: '',
            password: '',
            errors: {}
        }
        this.handleInputChange = this.handleInputChange.bind(this);
        this.handleSubmit = this.handleSubmit.bind(this);
    }

    handleInputChange(e) {
        this.setState({
            [e.target.name]: e.target.value
        })
    }

    handleSubmit(e) {
        e.preventDefault();
        const user = {
            email: this.state.email,
            password: this.state.password,
        }
        this.props.loginUser(user);
    }

    componentWillReceiveProps(nextProps) {

        if(nextProps.errors) {
            this.setState({
                errors: nextProps.errors
            });
        }
    }

    render() {
        const {errors} = this.state;
        return(
        <div className="container" style={{ marginTop: '50px', width: '700px'}}>
            <h2 style={{marginBottom: '40px'}}>Login</h2>
            <form onSubmit={ this.handleSubmit }>
                <div className="form-group">
                    <input
                    type="email"
                    placeholder="Email"
                    className={classnames('form-control form-control-lg', {
                        'is-invalid': errors.email
                    })}
                    name="email"
                    onChange={ this.handleInputChange }
                    value={ this.state.email }
                    />
                    {errors.email && (<div className="invalid-feedback">{errors.email}</div>)}
                </div>
                <div className="form-group">
                    <input
                    type="password"
                    placeholder="Password"
                    className={classnames('form-control form-control-lg', {
                        'is-invalid': errors.password
                    })}
                    name="password"
                    onChange={ this.handleInputChange }
                    value={ this.state.password }
                    />
                    {errors.password && (<div className="invalid-feedback">{errors.password}</div>)}
                </div>
                <div className="form-group">
                    <button type="submit" className="btn btn-primary">
                        Login User
                    </button>
                </div>
            </form>
        </div>
        )
    }
}

Login.propTypes = {
    errors: PropTypes.object.isRequired
}

const mapStateToProps = (state) => ({
    errors: state.errors
})

export  default connect(mapStateToProps, { loginUser })(Login)
Now, we can see the validation errors.

Now, if all of your credentials are right then we will get a token in response and we can see that token inside our console right now.
After getting a token, we need to store that token inside localStorage and set the header to add that token in the future request. So when we try to access any protected route then due to jwt token, we can access that route very easily.
#18: Set the Auth token.
Inside src folder, create one file called setAuthToken.js and add the following code.
// setAuthToken.js

import axios from 'axios';

const setAuthToken = token => {
    if(token) {
        axios.defaults.headers.common['Authorization'] = token;
    }
    else {
        delete axios.defaults.headers.common['Authorization'];
    }
}

export default setAuthToken;
Okay, now we have set the headers and add the Authorization to a token. Now, we need to save this token and set the current user as a logged in user.
Write the following code inside actions >> authentication.js file.
// authentication.js

import axios from 'axios';
import { GET_ERRORS, SET_CURRENT_USER } from './types';
import setAuthToken from '../setAuthToken';
import jwt_decode from 'jwt-decode';

export const registerUser = (user, history) => dispatch => {
    axios.post('/api/users/register', user)
            .then(res => history.push('/login'))
            .catch(err => {
                dispatch({
                    type: GET_ERRORS,
                    payload: err.response.data
                });
            });
}

export const loginUser = (user) => dispatch => {
    axios.post('/api/users/login', user)
            .then(res => {
                const { token } = res.data;
                localStorage.setItem('jwtToken', token);
                setAuthToken(token);
                const decoded = jwt_decode(token);
                dispatch(setCurrentUser(decoded));
            })
            .catch(err => {
                dispatch({
                    type: GET_ERRORS,
                    payload: err.response.data
                });
            });
}

export const setCurrentUser = decoded => {
    return {
        type: SET_CURRENT_USER,
        payload: decoded
    }
}
Also, we need to create one more reducer called authReducer.js and add the following code inside it.
// authReducer.js

import { SET_CURRENT_USER } from '../actions/types';
import isEmpty from '../validation/is-empty';

const initialState = {
    isAuthenticated: false,
    user: {}
}

export default function(state = initialState, action ) {
    switch(action.type) {
        case SET_CURRENT_USER:
            return {
                ...state,
                isAuthenticated: !isEmpty(action.payload),
                user: action.payload
            }
        default:
            return state;
    }
}
Import this reducer inside reducers >> index.js file.
// index.js

import { combineReducers } from 'redux';
import errorReducer from './errorReducer';
import authReducer from './authReducer';

export default combineReducers({
    errors: errorReducer,
    auth: authReducer
});
#19: Create a Logout.
Now, we need to connect the redux store to the component >> Navbar.js file and also we need to change the Navbar based on the User is logged in or not.
So write the following code inside Navbar.js file.
// Navbar.js

import React, { Component } from 'react';
import { Link } from 'react-router-dom';
import PropTypes from 'prop-types';
import { connect } from 'react-redux';
import { logoutUser } from '../actions/authentication';
import { withRouter } from 'react-router-dom';

class Navbar extends Component {

    onLogout(e) {
        e.preventDefault();
        this.props.logoutUser(this.props.history);
    }

    render() {
        const {isAuthenticated, user} = this.props.auth;
        const authLinks = (
            <ul className="navbar-nav ml-auto">
                <a href="#" className="nav-link" onClick={this.onLogout.bind(this)}>
                    <img src={user.avatar} alt={user.name} title={user.name}
                        className="rounded-circle"
                        style={{ width: '25px', marginRight: '5px'}} />
                            Logout
                </a>
            </ul>
        )
      const guestLinks = (
        <ul className="navbar-nav ml-auto">
            <li className="nav-item">
                <Link className="nav-link" to="/register">Sign Up</Link>
            </li>
            <li className="nav-item">
                <Link className="nav-link" to="/login">Sign In</Link>
            </li>
        </ul>
      )
        return(
            <nav className="navbar navbar-expand-lg navbar-light bg-light">
                <Link className="navbar-brand" to="/">Redux Node Auth</Link>
                <div className="collapse navbar-collapse" id="navbarSupportedContent">
                    {isAuthenticated ? authLinks : guestLinks}
                </div>
            </nav>
        )
    }
}
Navbar.propTypes = {
    logoutUser: PropTypes.func.isRequired,
    auth: PropTypes.object.isRequired
}

const mapStateToProps = (state) => ({
    auth: state.auth
})

export default connect(mapStateToProps, { logoutUser })(withRouter(Navbar));
Now, we need to create a logoutUser action inside actions >> authentication.js file.
// authentication.js

import axios from 'axios';
import { GET_ERRORS, SET_CURRENT_USER } from './types';
import setAuthToken from '../setAuthToken';
import jwt_decode from 'jwt-decode';

export const registerUser = (user, history) => dispatch => {
    axios.post('/api/users/register', user)
            .then(res => history.push('/login'))
            .catch(err => {
                dispatch({
                    type: GET_ERRORS,
                    payload: err.response.data
                });
            });
}

export const loginUser = (user) => dispatch => {
    axios.post('/api/users/login', user)
            .then(res => {
                const { token } = res.data;
                localStorage.setItem('jwtToken', token);
                setAuthToken(token);
                const decoded = jwt_decode(token);
                dispatch(setCurrentUser(decoded));
            })
            .catch(err => {
                dispatch({
                    type: GET_ERRORS,
                    payload: err.response.data
                });
            });
}

export const setCurrentUser = decoded => {
    return {
        type: SET_CURRENT_USER,
        payload: decoded
    }
}

export const logoutUser = (history) => dispatch => {
    localStorage.removeItem('jwtToken');
    setAuthToken(false);
    dispatch(setCurrentUser({}));
    history.push('/login');
}
Now, we can be able to log out the user successfully and we can also see that Navbar items are changing according to the user is logged in or not.
#20: Check the logged in user status.
If any point in time, the user is logged in then he can not able to see the login or register route. For that, we need to add some code inside Register.js and Login.js file.
Our final Register.js file looks like below. We have added a componentDidMount method. If the current user is logged in user and trying to register the new user, then it prevents it and redirects to a home route.
// Register.js

import React, { Component } from 'react';
import { connect } from 'react-redux';
import PropTypes from 'prop-types';
import { withRouter } from 'react-router-dom';
import { registerUser } from '../actions/authentication';
import classnames from 'classnames';

class Register extends Component {

    constructor() {
        super();
        this.state = {
            name: '',
            email: '',
            password: '',
            password_confirm: '',
            errors: {}
        }
        this.handleInputChange = this.handleInputChange.bind(this);
        this.handleSubmit = this.handleSubmit.bind(this);
    }

    handleInputChange(e) {
        this.setState({
            [e.target.name]: e.target.value
        })
    }

    handleSubmit(e) {
        e.preventDefault();
        const user = {
            name: this.state.name,
            email: this.state.email,
            password: this.state.password,
            password_confirm: this.state.password_confirm
        }
        this.props.registerUser(user, this.props.history);
    }

    componentWillReceiveProps(nextProps) {
        if(nextProps.auth.isAuthenticated) {
            this.props.history.push('/')
        }
        if(nextProps.errors) {
            this.setState({
                errors: nextProps.errors
            });
        }
    }

    componentDidMount() {
        if(this.props.auth.isAuthenticated) {
            this.props.history.push('/');
        }
    }

    render() {
        const { errors } = this.state;
        return(
        <div className="container" style={{ marginTop: '50px', width: '700px'}}>
            <h2 style={{marginBottom: '40px'}}>Registration</h2>
            <form onSubmit={ this.handleSubmit }>
                <div className="form-group">
                    <input
                    type="text"
                    placeholder="Name"
                    className={classnames('form-control form-control-lg', {
                        'is-invalid': errors.name
                    })}
                    name="name"
                    onChange={ this.handleInputChange }
                    value={ this.state.name }
                    />
                    {errors.name && (<div className="invalid-feedback">{errors.name}</div>)}
                </div>
                <div className="form-group">
                    <input
                    type="email"
                    placeholder="Email"
                    className={classnames('form-control form-control-lg', {
                        'is-invalid': errors.email
                    })}
                    name="email"
                    onChange={ this.handleInputChange }
                    value={ this.state.email }
                    />
                    {errors.email && (<div className="invalid-feedback">{errors.email}</div>)}
                </div>
                <div className="form-group">
                    <input
                    type="password"
                    placeholder="Password"
                    className={classnames('form-control form-control-lg', {
                        'is-invalid': errors.password
                    })}
                    name="password"
                    onChange={ this.handleInputChange }
                    value={ this.state.password }
                    />
                    {errors.password && (<div className="invalid-feedback">{errors.password}</div>)}
                </div>
                <div className="form-group">
                    <input
                    type="password"
                    placeholder="Confirm Password"
                    className={classnames('form-control form-control-lg', {
                        'is-invalid': errors.password_confirm
                    })}
                    name="password_confirm"
                    onChange={ this.handleInputChange }
                    value={ this.state.password_confirm }
                    />
                    {errors.password_confirm && (<div className="invalid-feedback">{errors.password_confirm}</div>)}
                </div>
                <div className="form-group">
                    <button type="submit" className="btn btn-primary">
                        Register User
                    </button>
                </div>
            </form>
        </div>
        )
    }
}

Register.propTypes = {
    registerUser: PropTypes.func.isRequired,
    auth: PropTypes.object.isRequired
};

const mapStateToProps = state => ({
    auth: state.auth,
    errors: state.errors
});

export default connect(mapStateToProps,{ registerUser })(withRouter(Register))
Also, we need to add some code inside src >> App.js file. The final App.js file looks like below.
// App.js

import React, { Component } from 'react';
import { BrowserRouter as Router, Route } from 'react-router-dom';
import { Provider } from 'react-redux';
import store from './store';
import jwt_decode from 'jwt-decode';
import setAuthToken from './setAuthToken';
import { setCurrentUser, logoutUser } from './actions/authentication';

import Navbar from './components/Navbar';
import Register from './components/Register';
import Login from './components/Login';
import Home from './components/Home';

import 'bootstrap/dist/css/bootstrap.min.css';

if(localStorage.jwtToken) {
  setAuthToken(localStorage.jwtToken);
  const decoded = jwt_decode(localStorage.jwtToken);
  store.dispatch(setCurrentUser(decoded));

  const currentTime = Date.now() / 1000;
  if(decoded.exp < currentTime) {
    store.dispatch(logoutUser());
    window.location.href = '/login'
  }
}

class App extends Component {
  render() {
    return (
      <Provider store = { store }>
        <Router>
            <div>
              <Navbar />
                <Route exact path="/" component={ Home } />
                <div className="container">
                  <Route exact path="/register" component={ Register } />
                  <Route exact path="/login" component={ Login } />
                </div>
            </div>
          </Router>
        </Provider>
    );
  }
}

export default App;
And also we need to add componentDidMount inside Login.js file.
// Login.js

import React, { Component } from 'react';
import PropTypes from 'prop-types';
import { connect } from 'react-redux';
import { loginUser } from '../actions/authentication';
import classnames from 'classnames';

class Login extends Component {

    constructor() {
        super();
        this.state = {
            email: '',
            password: '',
            errors: {}
        }
        this.handleInputChange = this.handleInputChange.bind(this);
        this.handleSubmit = this.handleSubmit.bind(this);
    }

    handleInputChange(e) {
        this.setState({
            [e.target.name]: e.target.value
        })
    }

    handleSubmit(e) {
        e.preventDefault();
        const user = {
            email: this.state.email,
            password: this.state.password,
        }
        this.props.loginUser(user);
    }

    componentDidMount() {
        if(this.props.auth.isAuthenticated) {
            this.props.history.push('/');
        }
    }

    componentWillReceiveProps(nextProps) {
        if(nextProps.auth.isAuthenticated) {
            this.props.history.push('/')
        }
        if(nextProps.errors) {
            this.setState({
                errors: nextProps.errors
            });
        }
    }

    render() {
        const {errors} = this.state;
        return(
        <div className="container" style={{ marginTop: '50px', width: '700px'}}>
            <h2 style={{marginBottom: '40px'}}>Login</h2>
            <form onSubmit={ this.handleSubmit }>
                <div className="form-group">
                    <input
                    type="email"
                    placeholder="Email"
                    className={classnames('form-control form-control-lg', {
                        'is-invalid': errors.email
                    })}
                    name="email"
                    onChange={ this.handleInputChange }
                    value={ this.state.email }
                    />
                    {errors.email && (<div className="invalid-feedback">{errors.email}</div>)}
                </div>
                <div className="form-group">
                    <input
                    type="password"
                    placeholder="Password"
                    className={classnames('form-control form-control-lg', {
                        'is-invalid': errors.password
                    })}
                    name="password"
                    onChange={ this.handleInputChange }
                    value={ this.state.password }
                    />
                    {errors.password && (<div className="invalid-feedback">{errors.password}</div>)}
                </div>
                <div className="form-group">
                    <button type="submit" className="btn btn-primary">
                        Login User
                    </button>
                </div>
            </form>
        </div>
        )
    }
}

Login.propTypes = {
    loginUser: PropTypes.func.isRequired,
    auth: PropTypes.object.isRequired,
    errors: PropTypes.object.isRequired
}

const mapStateToProps = (state) => ({
    auth: state.auth,
    errors: state.errors
})

export  default connect(mapStateToProps, { loginUser })(Login)
So, finally our React Redux Node MongoDB JWT Authentication Example Tutorial is over.
Register with a new User and it will redirect to a login page.
Login with your credentials and you can see the avatar is appearing inside the navbar and links are also changed.
Now, try to access the login or register route and you will be redirected to the root or home route.
Next, try to log out and you will be on the login page.
I have put the whole code on Github.
You can find more on Redux here.


0 comments:
Post a Comment
Note: only a member of this blog may post a comment.