What is Blazor WebAssembly? A WebAssembly is a virtual machine that runs inside the browser. It converts high level language codes like C# into low level language code so that they can be run on the browser directly. Blazor WebAssembly (WASM) apps executes directly in the browser on a WebAssembly, just like JavaScript.
Blazor WebAssembly apps are provided with the following things:
- APIs available to JavaScript applications.
- Cascading Style Sheets (CSS).
- Domain Object Model (DOM).
- Ability to initiate asynchronous HTTP requests.
In fact, it is right to call Blazor WebAssembly apps to be pure client-side applications, with access to all the same features of Blazor Server but without the need for a persistent HTTP connection.
WebAssembly restricts apps from accessing database. Therefore, you cannot perform Entity Framework Core database operations in your Blazor WebAssembly apps. However, there is another way to perform database operations, which is to create an API controller to wrap your database connection, and use HttpClient in your Blazor WebAssebly app to call the API. This thing is explained by the below given image.

In this tutorial I can going to perform database CRUD operations by calling Web API through my Blazor WebAssembly app.
Creating Blazor WebAssembly App
In your Visual Studio create a new Blazor WebAssembly APP as shown by the below image.

Next, select the latest version of DOT NET. We have selected the .NET version 7.0 for this Blazor WebAssembly app. Check below image.

Your app will be created with basic Blazor Configuration and a few pages. Run the app in Visual studio and you can see it runs perfectly. It’s time to start adding the CRUD feature in the app.
Note that I have named my app as BlazorWA so all the namespaces will be made with respect to this name. If you have chosen a different name the make sure the namespaces are correct for the codes to run correctly.
Web API and CRUD operations
The Web API that I will be calling here is made in ASP.NET Core MVC application.
This API has the following methods that I will be calling from my Blazor WebAssembly app.
- 1. HTTP GET method that provides all the reservations in JSON format. Another method also of type HTTP GET accepts a reservation id and returns it’s information.
- 2. HTTP POST method that accepts a reservation that will be inserted to the database. It returns the newly inserted reservation back to the client in JSON.
- 3. HTTP PUT method that updates a previously created reservation record. It receives the new values of a reservation and returns the updated reservation record back to the client.
- 4. HTTP DELETE method that deletes a reservation, whose id is sent by the client.
Start by creating Models folder on the root of the app. Inside it, create a new class and call it Reservation.cs. This class will hold the reservation object and it’s code is given below:
1 2 3 4 5 6 7 8 9 10 11 12 13 14 15 16 17 18 | using System.ComponentModel.DataAnnotations;namespace BlazorWA.Models{ public class Reservation { public int Id { get; set; } [Required] public string Name { get; set; } [Required] public string StartLocation { get; set; } [Required] public string EndLocation { get; set; } }} |
Next, create a CSS called validation.css inside the wwwroot folder with the following code. The work of this css will be to style the validation errors in red & orange colors.
1 2 3 4 5 6 7 8 9 10 11 12 13 14 15 16 17 18 19 20 21 22 23 24 | .validation-errors { background-color: #ff6a00; padding: 8px; font-size: 16px; font-weight: 500;}li.validation-message { color: #FFFFFF; font-weight: 500}div.validation-message { color: #ff6a00; font-weight: 500}modified.valid { border: solid 3px #ffd800;}.invalid { border: solid 3px #ff6a00;} |
Next, go to the _Imports.razor file (residing on the root folder of the app) and import the highlighted namespaces as shown below.
1 2 3 4 5 6 7 8 9 10 11 12 13 | @using System.Net.Http@using System.Net.Http.Json@using Microsoft.AspNetCore.Components.Forms@using Microsoft.AspNetCore.Components.Routing@using Microsoft.AspNetCore.Components.Web@using Microsoft.AspNetCore.Components.Web.Virtualization@using Microsoft.AspNetCore.Components.WebAssembly.Http@using Microsoft.JSInterop@using BlazorWA@using BlazorWA.Shared@using BlazorWA.Models@using Newtonsoft.Json@using System.Text |
Make sure to install the package Newtonsoft.Json to the app.
The C# classes belonging to these namespaces will be used when performing CRUD operations.
Now you need to add links on the sidebar so that you can navigate to the razor components that I will be creating shortly. The sidebar is formed by the NavMenu.razor component that resides inside the Shared folder.
The added links are shown in highlighted way in the below code.
1 2 3 4 5 6 7 8 9 10 11 12 13 14 15 16 17 18 19 20 21 22 23 24 25 26 27 28 29 30 31 32 33 34 35 36 37 38 39 40 41 42 | <div class="top-row pl-4 navbar navbar-dark"> <a class="navbar-brand" href="">BlazorWA</a> <button class="navbar-toggler" @onclick="ToggleNavMenu"> <span class="navbar-toggler-icon"></span> </button></div><div class="@NavMenuCssClass" @onclick="ToggleNavMenu"> <ul class="nav flex-column"> <li class="nav-item px-3"> <NavLink class="nav-link" href="" Match="NavLinkMatch.All"> <span class="oi oi-home" aria-hidden="true"></span> Home </NavLink> </li> <li class="nav-item px-3"> <NavLink class="nav-link" href="Read"> <span class="oi oi-list-rich" aria-hidden="true"></span> Read Reservation </NavLink> </li> <li class="nav-item px-3"> <NavLink class="nav-link" href="Create"> <span class="oi oi-plus" aria-hidden="true"></span> Create Reservation </NavLink> </li> <li class="nav-item px-3"> <NavLink class="nav-link" href="Get"> <span class="oi oi-list-rich" aria-hidden="true"></span> Get Reservation by Id </NavLink> </li> </ul></div>@code { private bool collapseNavMenu = true; private string NavMenuCssClass => collapseNavMenu ? "collapse" : null; private void ToggleNavMenu() { collapseNavMenu = !collapseNavMenu; }} |
Create Reservation
The Web API has a HTTP POST method that inserts a reservation in the database. It’s skeleton code is given below:
[HttpPost]
public Reservation Post([FromBody] Reservation res) =>
repository.AddReservation(new Reservation
{
    Name = res.Name,
    StartLocation = res.StartLocation,
    EndLocation = res.EndLocation
});
Here I will call this API method in order to create a new reservation. So, create a new Razor Component file called Create.razor. It will contain a reservation form as shown by the below image:

User can add a new reservation to the database by filling and submitting this form. The full code of this component is given below.
@page "/Create"
<link href="/validation.css" rel="stylesheet" />

<h1 class="bg-info text-white">Create Reservation</h1>
<h2 class="text-success p-2">@FormSubmitMessage</h2>

<EditForm Model="ReservationData" OnValidSubmit="HandleValidSubmit" OnInvalidSubmit="HandleInvalidSubmit">
    <DataAnnotationsValidator/>
    <ValidationSummary />

    <div class="form-group">
        <label>Name</label>
        <ValidationMessage For="@(() => ReservationData.Name)" />
        <InputText class="form-control" @bind-Value="ReservationData.Name" />
    </div>
    <div class="form-group">
        <label>Start Location</label>
        <ValidationMessage For="@(() => ReservationData.StartLocation)" />
        <InputText class="form-control" @bind-Value="ReservationData.StartLocation" />
    </div>
    <div class="form-group">
        <label>End Location</label>
        <ValidationMessage For="@(() => ReservationData.EndLocation)" />
        <InputText class="form-control" @bind-Value="ReservationData.EndLocation" />
    </div>
    <div class="form-group">
        <button type="submit" class="btn btn-primary">Click</button>
    </div>
</EditForm>

@if (ReceivedReservation != null)
{
    <h3 class="text-warning p-2">Reservation</h3>
    <table class="table table-sm table-striped table-bordered m-2">
        <thead>
            <tr>
                <th>ID</th>
                <th>Name</th>
                <th>Start Location</th>
                <th>End Location</th>
            </tr>
        </thead>
        <tbody>
            <tr>
                <td>@ReceivedReservation.Id</td>
                <td>@ReceivedReservation.Name</td>
                <td>@ReceivedReservation.StartLocation</td>
                <td>@ReceivedReservation.EndLocation</td>
            </tr>
        </tbody>
    </table>
}

@code {
    public Reservation ReservationData = new Reservation();
    Reservation ReceivedReservation;
    public string FormSubmitMessage { get; set; } = "Reservation Not Created";

    public async Task HandleValidSubmit()
    {
        ReceivedReservation = new Reservation();
        using (var httpClient = new HttpClient())
        {
            StringContent content = new StringContent(JsonConvert.SerializeObject(ReservationData), Encoding.UTF8, "application/json");

            using (var response = await httpClient.PostAsync("https://localhost:44324/api/Reservation", content))
            {
                string apiResponse = await response.Content.ReadAsStringAsync();
                ReceivedReservation = JsonConvert.DeserializeObject<Reservation>(apiResponse);
            }
        }
        FormSubmitMessage = "Reservation Created";
    }

    public void HandleInvalidSubmit() => FormSubmitMessage = "Invalid Reservation";
}
When the form is submitted the method HandleValidSubmit is called. In this method the Web API call is made and the reservation data is sent to the API for inserting into the database.
I made a new object of the HttpClient class that is used for sending HTTP requests to the APIs and also for receiving HTTP responses from the APIs.
Then I use this object for sending the reservation information in the form to the API.
using (var httpClient = new HttpClient())
{
    StringContent content = new StringContent(JsonConvert.SerializeObject(ReservationData), Encoding.UTF8, "application/json");

    using (var response = await httpClient.PostAsync("https://localhost:44324/api/Reservation", content))
    {
        string apiResponse = await response.Content.ReadAsStringAsync();
        ReceivedReservation = JsonConvert.DeserializeObject<Reservation>(apiResponse);
    }
}The reservation information is added to the HTTP request body and this is done by the StringContent class:
StringContent content = new StringContent(JsonConvert.SerializeObject(ReservationData), Encoding.UTF8, "application/json");
…
var response = await httpClient.PostAsync("https://localhost:44324/api/Reservation", content)
The API method is called at the URL – https://localhost:44324/api/Reservation and the response is received in the variable called “ReceivedReservation”. This variable is used to create a html table that shows the newly created reservation data.
1 2 3 4 5 6 7 8 9 10 11 12 13 14 15 16 17 18 | <table class="table table-sm table-striped table-bordered m-2"> <thead> <tr> <th>ID</th> <th>Name</th> <th>Start Location</th> <th>End Location</th> </tr> </thead> <tbody> <tr> <td>@ReceivedReservation.Id</td> <td>@ReceivedReservation.Name</td> <td>@ReceivedReservation.StartLocation</td> <td>@ReceivedReservation.EndLocation</td> </tr> </tbody></table> |
Note that our Web API is running on the port 44324. You can simply open the Web API project in another instance of Visual Studio and run it. Running will make the Web API accessible to the Blazor WebAssembly app.
Next run the Blazor WebAssembly app and navigate to the Create Reservation link. In the form presented to you, fill and submit a new reservation.
I have shown the complete procedure of creating a new reservation and the new reservation receiving back from the API in the below video.
Read All Reservation
The Web API has a HTTP GET method that returns all the reservations in JSON. It’s skeleton is shown below.
[HttpGet]
public IEnumerable<Reservation> Get() => repository.Reservations;
Now I will call this HTTP GET method to read all the reservations. So, create a new Razor component file called Read.razor inside the Pages folder of your app. The full code to be added to this component is given below:
@page "/Read"

<h1 class="bg-info text-white">Read Reservations</h1>

<NavLink class="btn btn-primary" href="Create">Create Reservation</NavLink>
<NavLink class="btn btn-secondary" href="Get">Get Reservation</NavLink>

<table class="table table-sm table-striped table-bordered m-2">
    <thead>
        <tr>
            <th>ID</th>
            <th>Name</th>
            <th>Start Location</th>
            <th>End Location</th>
        </tr>
    </thead>
    <tbody>
        @foreach (Reservation r in Reservations)
        {
            <tr>
                <td>@r.Id</td>
                <td>@r.Name</td>
                <td>@r.StartLocation</td>
                <td>@r.EndLocation</td>
            </tr>
        }
    </tbody>
</table>

@code {
    [Inject]
    public NavigationManager NV { get; set; }

    public IEnumerable<Reservation> Reservations { get; set; } = Enumerable.Empty<Reservation>();

    protected async override Task OnInitializedAsync()
    {
        await CallAPI();
    }

    async Task CallAPI()
    {
        using (var httpClient = new HttpClient())
        {
            using (var response = await httpClient.GetAsync("https://localhost:44324/api/Reservation"))
            {
                string apiResponse = await response.Content.ReadAsStringAsync();
                Reservations = JsonConvert.DeserializeObject<List<Reservation>>(apiResponse);
            }
        }
    }
}
On the OnInitializedAsync Lifecyle method of the razor component, I have called a C# method CallAPI which makes an API call to the HTTP GET method. The HttpClient class is once again used to make this call, see the below code.
Using (var httpClient = new HttpClient())
{
    using (var response = await httpClient.GetAsync("https://localhost:44324/api/Reservation"))
    {
        string apiResponse = await response.Content.ReadAsStringAsync();
        Reservations = JsonConvert.DeserializeObject<List<Reservation>>(apiResponse);
    }
}
The reservations received in JSON are deserialized to the Reservation class object and is shown inside the HTML table.
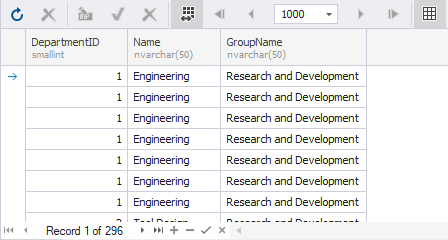
Reservations = JsonConvert.DeserializeObject<List<Reservation>>(apiResponse);Run the APP and navigate to the Read Reservation URL where you will be shown all the reservations that the API has sent to the Blazor wasm app. Check below image which shows the reservations.

Read a Reservation by it’s “Id”
I can also read a particular reservation record by calling the below shown method of the Web API. Note – here I have to sent the “id” of the reservation to the URL of the API.
[HttpGet("{id}")]
public Reservation Get(int id) => repository[id];
So, create a new razor component file called Get.razor and add the following code to it.
@page "/Get"
<link href="/validation.css" rel="stylesheet" />

<h1 class="bg-info text-white">Get Reservation by Id</h1>

<div class="form-group">
    <label>Id</label>
    <input class="form-control" type="text" @bind="Id" />
</div>
<div class="form-group">
    <button class="btn btn-primary" @onclick="GetReservation">Click</button>
</div>

@if (ReceivedReservation != null)
{
    <h3 class="text-warning p-2">Reservation</h3>
    <table class="table table-sm table-striped table-bordered m-2">
        <thead>
            <tr>
                <th>ID</th>
                <th>Name</th>
                <th>Start Location</th>
                <th>End Location</th>
            </tr>
        </thead>
        <tbody>
            <tr>
                <td>@ReceivedReservation.Id</td>
                <td>@ReceivedReservation.Name</td>
                <td>@ReceivedReservation.StartLocation</td>
                <td>@ReceivedReservation.EndLocation</td>
            </tr>
        </tbody>
    </table>
}

@code {
    public int Id { get; set; }
    public Reservation ReceivedReservation;

    public async Task GetReservation()
    {
        ReceivedReservation = new Reservation();
        using (var httpClient = new HttpClient())
        {
            using (var response = await httpClient.GetAsync("https://localhost:44324/api/Reservation/" + Id))
            {
                string apiResponse = await response.Content.ReadAsStringAsync();
                ReceivedReservation = JsonConvert.DeserializeObject<Reservation>(apiResponse);
            }
        }
    }
}
This component presents a text box to the user where he needs to enter the Id of the reservation to be read. The API call is made by the below code:
using (var httpClient = new HttpClient())
{
    using (var response = await httpClient.GetAsync("https://localhost:44324/api/Reservation/" + Id))
    {
        string apiResponse = await response.Content.ReadAsStringAsync();
        ReceivedReservation = JsonConvert.DeserializeObject<Reservation>(apiResponse);
    }
}
Notice the Id of the reservation is added to the API URL as:
using (var response = await httpClient.GetAsync("https://localhost:44324/api/Reservation/" + Id))The received reservation is shown in the HTML Table given on the component.
Run your Blazor WebAssembly App and navigate to Get Reservation by Id link. Here enter 3 on the text box and click the button. You will receive the 3rd reservation and it will be shown on the component. See the below image:

Update a Reservation
Now I will update a reservation record by calling the HTTP PUT method of the API which is shown below:
1 2 | [HttpPut]public Reservation Put([FromForm] Reservation res) => repository.UpdateReservation(res); |
So, create a new razor component called Update.razor inside the Pages folder of the Blazor WebAssembly App.
The component’s work is to fetch the reservation (whose id is provided to it) by calling a method of the Web API and showing it on a form. The user can update the reservation fields and submit the form, and that will update the reservation by calling another method of the Web API.
Next, add the following code to the component.
1 2 3 4 5 6 7 8 9 10 11 12 13 14 15 16 17 18 19 20 21 22 23 24 25 26 27 28 29 30 31 32 33 34 35 36 37 38 39 40 41 42 43 44 45 46 47 48 49 50 51 52 53 54 55 56 57 58 59 60 61 62 63 64 65 66 67 68 69 70 71 72 73 74 75 76 77 78 79 80 81 82 83 84 85 86 87 88 89 90 91 92 93 94 95 96 97 98 99 100 101 102 | @page "/Update/{id:int}"<link href="/validation.css" rel="stylesheet" /><h1 class="bg-info text-white">Update Reservation</h1><h2 class="text-success p-2">@FormSubmitMessage</h2><EditForm Model="ReservationData" OnValidSubmit="HandleValidSubmit" OnInvalidSubmit="HandleInvalidSubmit"> <DataAnnotationsValidator /> <ValidationSummary /> <div class="form-group"> <label>Id</label> <ValidationMessage For="@(() => ReservationData.Id)" /> <InputNumber disabled class="form-control" @bind-Value="ReservationData.Id" /> </div> <div class="form-group"> <label>Name</label> <ValidationMessage For="@(() => ReservationData.Name)" /> <InputText class="form-control" @bind-Value="ReservationData.Name" /> </div> <div class="form-group"> <label>Start Location</label> <ValidationMessage For="@(() => ReservationData.StartLocation)" /> <InputText class="form-control" @bind-Value="ReservationData.StartLocation" /> </div> <div class="form-group"> <label>End Location</label> <ValidationMessage For="@(() => ReservationData.EndLocation)" /> <InputText class="form-control" @bind-Value="ReservationData.EndLocation" /> </div> <div class="form-group"> <button type="submit" class="btn btn-primary">Click</button> </div></EditForm>@if (ReceivedReservation != null){ <h3 class="text-warning p-2">Reservation</h3> <table class="table table-sm table-striped table-bordered m-2"> <thead> <tr> <th>ID</th> <th>Name</th> <th>Start Location</th> <th>End Location</th> </tr> </thead> <tbody> <tr> <td>@ReceivedReservation.Id</td> <td>@ReceivedReservation.Name</td> <td>@ReceivedReservation.StartLocation</td> <td>@ReceivedReservation.EndLocation</td> </tr> </tbody> </table>}@code { public Reservation ReservationData; public Reservation ReceivedReservation; public string FormSubmitMessage { get; set; } = "Reservation Not Updated"; [Parameter] public int Id { get; set; } public async Task HandleValidSubmit() { ReceivedReservation = new Reservation(); using (var httpClient = new HttpClient()) { var content = new MultipartFormDataContent(); content.Add(new StringContent(ReservationData.Id.ToString()), "Id"); content.Add(new StringContent(ReservationData.Name), "Name"); content.Add(new StringContent(ReservationData.StartLocation), "StartLocation"); content.Add(new StringContent(ReservationData.EndLocation), "EndLocation"); using (var response = await httpClient.PutAsync("https://localhost:44324/api/Reservation", content)) { string apiResponse = await response.Content.ReadAsStringAsync(); ReceivedReservation = JsonConvert.DeserializeObject<Reservation>(apiResponse); } } FormSubmitMessage = "Reservation Updated"; } protected async override Task OnParametersSetAsync() { ReservationData = new Reservation(); using (var httpClient = new HttpClient()) { using (var response = await httpClient.GetAsync("https://localhost:44324/api/Reservation/" + Id)) { string apiResponse = await response.Content.ReadAsStringAsync(); ReservationData = JsonConvert.DeserializeObject<Reservation>(apiResponse); } } } public void HandleInvalidSubmit() => FormSubmitMessage = "Invalid Reservation";} |
The component receives the id of the reservation, which is to be fetched from the API, in it’s route parameter id. It is specified in the @page directive.
@page "/Update/{id:int}"This id value is received by it’s component parameter shown below:
[Parameter]
public int Id { get; set; }
Then on the OnParametersSetAsync lifecycle method, I make a call to the API to fetch the corresponding reservation (whose Id is received in the route parameter). This code is shown below:
protected async override Task OnParametersSetAsync()
{
    ReservationData = new Reservation();
    using (var httpClient = new HttpClient())
    {
        using (var response = await httpClient.GetAsync("https://localhost:44324/api/Reservation/" + Id))
        {
            string apiResponse = await response.Content.ReadAsStringAsync();
            ReservationData = JsonConvert.DeserializeObject<Reservation>(apiResponse);
        }
    }
}
Next the ReservationData variable which receives this reservation (as it is deserialized to Reservation class object), is used to show the reservation on the form.
<EditForm Model="ReservationData" OnValidSubmit="HandleValidSubmit" OnInvalidSubmit="HandleInvalidSubmit">
…
</EditForm>
The user can update the reservation by adding new values and submitting the form. This will call the HandleValidSubmit method that calls the Web API. The following code does this work:
using (var httpClient = new HttpClient())
{
    …

    using (var response = await httpClient.PutAsync("https://localhost:44324/api/Reservation", content))
    {
        string apiResponse = await response.Content.ReadAsStringAsync();
        ReceivedReservation = JsonConvert.DeserializeObject<Reservation>(apiResponse);
    }
}Since the HTTP PUT method asks for the updated values of the reservation on the Form-Data of the HTTP request therefore I have used the MultipartFormDataContent class to do this task. This code is shown below.
1 2 3 4 5 | var content = new MultipartFormDataContent();content.Add(new StringContent(ReservationData.Id.ToString()), "Id");content.Add(new StringContent(ReservationData.Name), "Name"); content.Add(new StringContent(ReservationData.StartLocation), "StartLocation");content.Add(new StringContent(ReservationData.EndLocation), "EndLocation"); |
Once the reservation is updated, the updated reservation is send back as a response, and it is shown in the HTML table.
1 2 3 4 5 6 7 8 9 10 11 12 13 14 15 16 17 18 | <table class="table table-sm table-striped table-bordered m-2"> <thead> <tr> <th>ID</th> <th>Name</th> <th>Start Location</th> <th>End Location</th> </tr> </thead> <tbody> <tr> <td>@ReceivedReservation.Id</td> <td>@ReceivedReservation.Name</td> <td>@ReceivedReservation.StartLocation</td> <td>@ReceivedReservation.EndLocation</td> </tr> </tbody></table> |
Link the newly created Update.razor component from the html table that shows all the reservations. This html table is given on the Read.razor component. Add a new Update column and add a link to the Update.razor and pass the Id of the reservation in it’s url. I have shown this in the highlighted code below.
See the below code.
1 2 3 4 5 6 7 8 9 10 11 12 13 14 15 16 17 18 19 20 21 22 23 24 25 26 27 | <table class="table table-sm table-striped table-bordered m-2"> <thead> <tr> <th>ID</th> <th>Name</th> <th>Start Location</th> <th>End Location</th> <th>Update</th> </tr> </thead> <tbody> @foreach (Reservation r in Reservations) { <tr> <td>@r.Id</td> <td>@r.Name</td> <td>@r.StartLocation</td> <td>@r.EndLocation</td> <td> <a href="Update/@r.Id"> <img src="/icon/edit.png" /> </a> </td> </tr> } </tbody></table> |
Now run the Blazor wasm app and check the Update feature. I have shown this in the below given video.
Delete a Reservation
The last of the CRUD operation is of delete reservation. Here I will need to call HTTP DELETE method of the Web API to do the deletion of a reservation. The skeleton of this method is given below.
[HttpDelete("{id}")]
public void Delete(int id) => repository.DeleteReservation(id);
The Delete feature is added to the same Read.razor component which shows all the reservations. You have to add a new Delete Column to the HTML table. In this column add a button which on clicking will delete the record.
I have shown this in highlighted manner in the below code of the Read.razor component.
1 2 3 4 5 6 7 8 9 10 11 12 13 14 15 16 17 18 19 20 21 22 23 24 25 26 27 28 29 30 31 32 33 34 35 36 37 38 39 40 41 42 43 44 45 46 47 48 49 50 51 52 53 54 55 56 57 58 59 60 61 62 63 64 65 66 67 68 69 70 71 72 73 74 75 76 | @page "/Read"<h1 class="bg-info text-white">Read Reservations</h1><NavLink class="btn btn-primary" href="Create">Create Reservation</NavLink><NavLink class="btn btn-secondary" href="Get">Get Reservation</NavLink><table class="table table-sm table-striped table-bordered m-2"> <thead> <tr> <th>ID</th> <th>Name</th> <th>Start Location</th> <th>End Location</th> <th>Update</th> <th>Delete</th> </tr> </thead> <tbody> @foreach (Reservation r in Reservations) { <tr> <td>@r.Id</td> <td>@r.Name</td> <td>@r.StartLocation</td> <td>@r.EndLocation</td> <td> <a href="Update/@r.Id"> <img src="/icon/edit.png" /> </a> </td> <td> <button class="btn btn-sm btn-danger" @onclick="@(() => Delete(r))"> <img src="/icon/close.png" /> </button> </td> </tr> } </tbody></table>@code { [Inject] public NavigationManager NV { get; set; } public IEnumerable<Reservation> Reservations { get; set; } = Enumerable.Empty<Reservation>(); protected async override Task OnInitializedAsync() { await CallAPI(); } async Task CallAPI() { using (var httpClient = new HttpClient()) { using (var response = await httpClient.GetAsync("https://localhost:44324/api/Reservation")) { string apiResponse = await response.Content.ReadAsStringAsync(); Reservations = JsonConvert.DeserializeObject<List<Reservation>>(apiResponse); } } } public async Task Delete(Reservation r) { using (var httpClient = new HttpClient()) { using (var response = await httpClient.DeleteAsync("https://localhost:44324/api/Reservation/" + r.Id)) { string apiResponse = await response.Content.ReadAsStringAsync(); } } await CallAPI(); }} |
The delete button call a method by the name “Delete”. In this method the call to the API is made, and that deletes our record. The deletion code is:
using (var httpClient = new HttpClient())
{
    using (var response = await httpClient.DeleteAsync("https://localhost:44324/api/Reservation/" + r.Id))
    {
        string apiResponse = await response.Content.ReadAsStringAsync();
    }
}
Note that I have used DeletAsync() method of the HttpClient class to call the HTTP DELETE type of Web API method.
Run your Blazor WebAssembly APP and perform the deletion as shown by the below video.
Upload Images to API from Blazor WASM
Now I will show how you can Upload Image files to Web API from Blazor WASM app. The Web API has an “Upload File method” that accepts IFormFile type of parameter. The skeleton of this method is given below.
[HttpPost("UploadFile")]
public async Task<string> UploadFile([FromForm] IFormFile file)
{
    string path = Path.Combine(webHostEnvironment.WebRootPath, "Images/" + file.FileName);
    using (var stream = new FileStream(path, FileMode.Create))
    {
        await file.CopyToAsync(stream);
    }
    return "https://localhost:44324/Images/" + file.FileName;
}
I will call this above method of the API from Blazor WASM app. So, create a new razor component called Upload.razor. It’s code is given below.
@page "/Upload"
<link href="/validation.css" rel="stylesheet" />

<h1 class="bg-info text-white">Upload File</h1>

<div class="form-group">
    <InputFile OnChange="@ChangeHandler" />
</div>
<div class="form-group">
    <button class="btn btn-primary" @onclick="UploadFile">Click</button>
</div>

@if (apiResponse != null)
{
    <h2>Uploaded File</h2>
    <img src="@apiResponse" />
}

@code {
    public string apiResponse { get; set; }
    public IBrowserFile F;

    private void ChangeHandler(InputFileChangeEventArgs e)
    {
        F = e.File;
    }

    public async Task UploadFile()
    {
        if (F != null)
        {
            // 968435456 is roughly equalt to 900 mb file size
            using (var ms = F.OpenReadStream(968435456))
            {
                var content = new MultipartFormDataContent();
                content.Add(new StreamContent(ms), "file", F.Name);

                using (var httpClient = new HttpClient())
                {
                    using (var response = await httpClient.PostAsync("https://localhost:44324/api/Reservation/UploadFile", content))
                    {
                        response.EnsureSuccessStatusCode();
                        apiResponse = await response.Content.ReadAsStringAsync();
                    }
                }
            }
        }
    }
}
The component has an InputFile that can be use to add a file.
<InputFile OnChange="@ChangeHandler" />The onchange event sets the IBrowserFile variable called “F” with the supplied file to the InputFile component.
private void ChangeHandler(InputFileChangeEventArgs e)
{
    F = e.File;
}
The button given on the component calls the Web API method and uploads the file to it.
I opened a stream and allowed up to 900 mb file size to be uploaded.
// 968435456 is roughly equalt to 900 mb file size
using (var ms = F.OpenReadStream(968435456))
{
…
}
Then created a MultiPartFormDataContent variable, populate it, and send it to the HttpClient class method PostAsync.
The below code does the calling of the Web API.
using (var httpClient = new HttpClient())
{
    using (var response = await httpClient.PostAsync("https://localhost:44324/api/Reservation/UploadFile", content))
    {
        response.EnsureSuccessStatusCode();
        apiResponse = await response.Content.ReadAsStringAsync();
    }
}
The Web API sends back a response which contains the path to the uploaded file, and I show this inside an img tag.
1 2 3 4 5 | @if (apiResponse != null){ <h2>Uploaded File</h2> <img src="@apiResponse" />} |
Before testing this feature make sure to add the link to this newly created component to the NavMenu.razor. Check below code.
<li class="nav-item px-3">
    <NavLink class="nav-link" href="Upload">
        <span class="oi oi-list-rich" aria-hidden="true"></span> Upload Image File
    </NavLink>
</li>
Now run the app and upload an image file. I have shown this in the below video.

Download the source codes
In this Blazor WebAssembly tutorial I created CRUD operations by calling Web API methods. I hope you liked this video and enjoyed learning Blazor WebAssembly and it’s features.