HI WELCOME TO SIRIS
Showing posts with label Powerapps. Show all posts

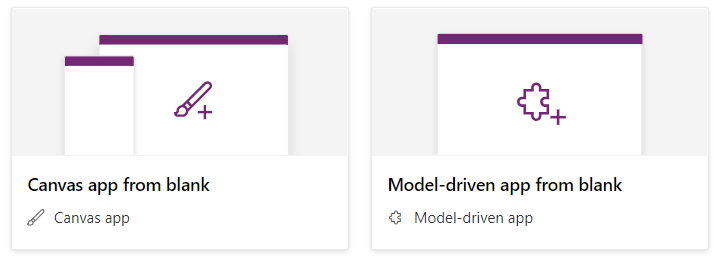
PowerApps have four major components (powerapps canvas app vs model driven vs portal)

Leave a Comment

 PowerApps have four major components

  1. Canvas apps
  2. Model-driven apps
  3. Portals
  4. Common Data Service

Each one has a feature to make you start with it, In other words, based on your needs and experience you can select which one you will use.


So let us get to know about

  • PowerApps App types.
  • PowerApps App Usage.

1. Canvas apps

It gives you a blank canvas and allows you to design the form, also it allows you to connect with 200 types of data sources.
what Canvas App when can I use it in PowerApps

Canvas Apps Usage

So if you have experience and want to create a highly tailored interface for web, mobile, and tablet applications you can start with this.

If you want to make your own design then canvas apps is the best choice for you as it provides you with a blank canvas and you have to drag and drop elements to the canvas without any codes as if you will design a PowerPoint slide, also it enables you to connect to a wide range of more than 200 other data sources, types of data source

2. Model-driven apps

It automatically generates forms and views for you from the existing data source using Common Data Service to model forms. and the app will be responsive across devices.
what model-driven app when can I use it in PowerApps

Model-driven apps Usage

So If you want to generate a form from existing data and no need to make maker changes this will be the best choice.

If you don’t have a custom design and your data is in a common data service then you will choose model-driven, by using model-driven you can do responsive apps “simple or very complex app and it provides you with the most layouts of the components you add

3. Portal

It allows you to create external-facing websites and allows you to choices between build the form anonymously or authenticated users, It's creating and viewing data in Common Data Service.
what portal app when can I use it in PowerApps

Portal Usage

So if you want to make it as part of your website and/or want sign in to access the data, start with it.

Power Apps Portal is external-facing websites that enable users outside their organizations to sign in as “authenticated users” to create and view data and also provides viewing the content anonymously

4. Common Data Service

It is the data platform that comes with PowerApps and allows you to store and model business data. It's the platform on which Dynamics 365 applications are built.

Common Data Service Usage

So if you’re a Dynamics customer, your data is already in the Common Data Service

I hope this answer gives you an idea about the types

Difference Between Canvas App And Model Driven App

Leave a Comment


 Model-Driven Apps Canvas App
Model-Driven Apps is an AppModule enabling users to design and develop component-focused apps to implement an end-to-end business process.
Canvas App is an AppModule enabling users to design and develop task-specific apps with designing flexibility.
To implement and develop Model-Driven Apps one needs,
  • The license of Dynamics 365 Product ( CE : Finance: Operations)
 
To implement and develop Canvas Apps one needs,
  • The license of Power Platform
  • Necessary Roles and Permission in Data Verse
Model-Driven Apps can connect and interact with only one data connector that is Data Verse.
Canvas Apps can connect and interact with over 350+ Connectors, empowering users to have more functionalities.
Logic implementation can be done in multiple ways including,
  • Business Rules
  • Workflows
  • Actions
  • Plugins
    Logic implementation is app-specific and can be done through,
    • Excel-like formula and conditional checks
      The design and view of App are governed by the components been utilized in the application.
        Design of application is more user friendly and larger flexibility for the developer to cater to look and feel requirement.
          Does not support version control, changes once done have to be rolled back by subsequent deployment.
            Supports version control and changes once done can be reverted at any point through a simple click.
              Can not be added or utilized in Microsoft Teams and specific to users of Dynamics.
                Supports and can be used in Microsoft Teams with no efforts, within spec of seconds.
                  Does not have any specific feature to track the usage of the implemented app.
                    A feature offered by Microsoft which helps to track the usage of an app developed, offering avenues to improvise and make it more user friendly.

                    Top 9 Reasons to Use Power Apps

                    Leave a Comment

                     Once upon a time, we lived in a world where only pro developers could be involved in the actual making of a so-called app. This was the traditional model of development work. You would come up with a genius business idea to effectively optimize your operations and enhance productivity through a simple idea. That idea was then pushed or outsourced to a development team who then followed a very “waterfall” type approach to design, develop, test, and then release your idea by the time you are 85 years of age. Not only was the process dreadfully long but the solution that was designed was vastly different from the idea that you originally envisioned, only $75,000 more expensive. The risk was all on you.

                    Let’s come to present day 2020 which according to many is truly the worst year ever – global economic recession, stock markets crashing, Black Lives Matter protests, major wildfires throughout the world, Kobe Bryant dying, and did I mention the COVID-19 pandemic? But for the technology enthusiast there was light at the end of the tunnel – Power Platform – a powerful set of applications that enables you to analyze data, build solutions, automate processes, and create virtual agents.

                    Power Apps is part of the Power Platform family along with Power BIPower Automate, and Power Virtual Agents. Here is a list of some of the many capabilities and possible uses of Power Apps:

                    1. No Code Required

                    With Power Apps, you can quickly create a usable version of your app to solve business challenges with low/no-code, affordable price, and relatively quick turn around.

                    2. Automation

                    Apps built using Power Apps provide business logic and workflows that transform manual processes and automate them.

                    3. Cross-Functional Experience

                    Power Apps are designed to be responsive and can seamlessly operate in any browser, mobile device, or laptop.

                    4. Data Connectors and Extensions

                    As a Power Apps user, you can allow interaction with data and meta data, apply business logic, create custom connectors, and integrate with external data. In fact, there are over 275+ built-in data connectors readily available that you can leverage, allowing you to build apps with your data.

                    5. Share Your App

                    You can run the apps you create and share them with other users so they can use the app in their browser, phone, or laptop.

                    6. Common Data Service (CDS)

                    Power Apps uses the CDS to store and secure data which enables you to build apps using Power Apps and CDS directly against your business data. For instance, if you have a Dynamics 365 CRM or ERP solution, you can directly use that data across Power Apps without any custom integrations required.

                    7. Office 365 Integration

                    Power Apps is also integrated with your Microsoft Office 365. You can use the data in your SharePoint or data that you have on an Excel spreadsheet and update the data across the different applications in real time. This means you can always rely on your data, as it is always up to date and available when you need it. The Office integration also makes it seamless to adopt because it uses a familiar user interface that you are already accustomed to. For instance, if you use Microsoft Teams, there are out-of-the-box tabs you can include on your Team channels that allow you to use Power Apps and interact with the data.

                    8. Time is of the Essence

                    Speed is fundamental. In the technologically advanced world we live in, having something at your fingertips a month later is too late. Using Power Apps you can quickly develop useful and meaningful apps that are functional and serve their purpose. Power Apps has drag and drop capabilities allowing you to add buttons, images, data tables, text, data connectors, and labels rapidly.

                    9. Ease of Use

                    It has never been easier in the history of building apps than it is now to create, share, and use an app. You could build an app while sitting in your home office, on the way to the grocery store, or waiting to pick up your kids at school. You can create apps using the mobile app, a browser app, or your own desktop app.

                    If you want to stay relevant in the progressive world we live in, get a head start by using Power Apps.

                    A Beginner’s Guide to Microsoft PowerApps(what is powerapps)

                    Leave a Comment

                     PowerApps is, fundamentally, a development platform for mobile and web apps. It allows “citizen developers” to reach capabilities that were once only reserved for high-end development tools. What’s more, PowerApps is generally quite easy to learn. You can use it to swiftly take charge of your destiny as long as you make the correct decisions when it comes to structuring. Follow this guide to help avoid any nasty surprises.

                    What is the Power Platform for PowerApps?

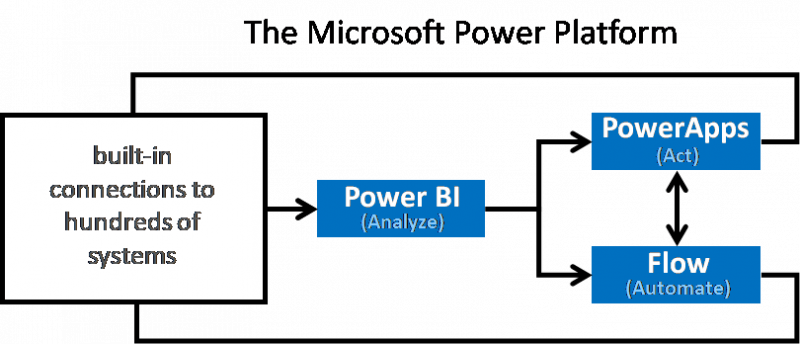
                    The Power Platform is comprised of the Power BI, PowerApps, and Flow. Microsoft has been increasingly promoting this as a whole. These three services provide tools to manage our digital world where data is king and the basis of any enterprise process. Their applications are as follows:

                    1. You can display and analyze data with Power BI.
                    2. You can act and modify data with PowerApps.
                    3. You can automate data with Flow.

                    For more details on Power Platform positioning, you can refer to this official blog post.
                    How to Build an App with Microsoft PowerApps

                    The simplest way to build a PowerApps app is to start from the data source. This is part one in a three-part process:

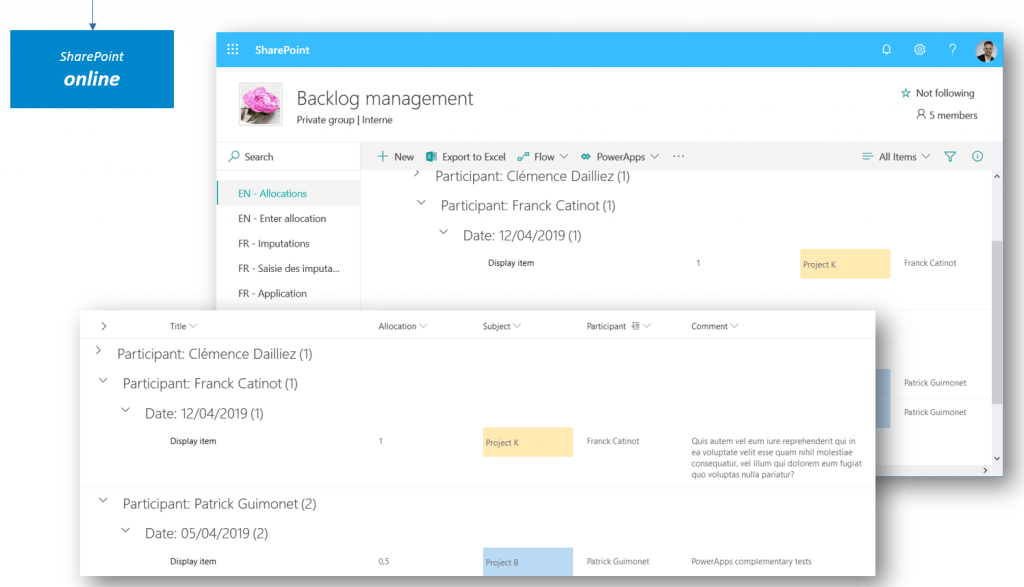
                    1. For this example, we’ll start from a SharePoint list that stores consulting interventions:
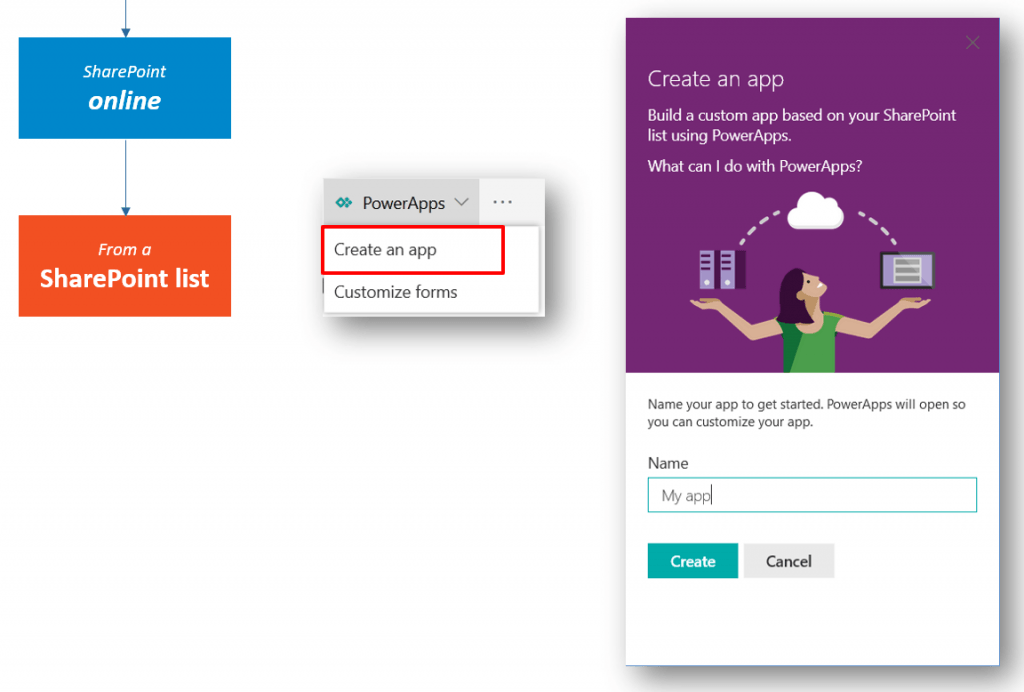
                    2. Next, we’ll select the “Create an app” option in the PowerApps menu:
                    3. This takes us to the PowerApps Studio where we’ll find a fully functional canvas app generated by the system:
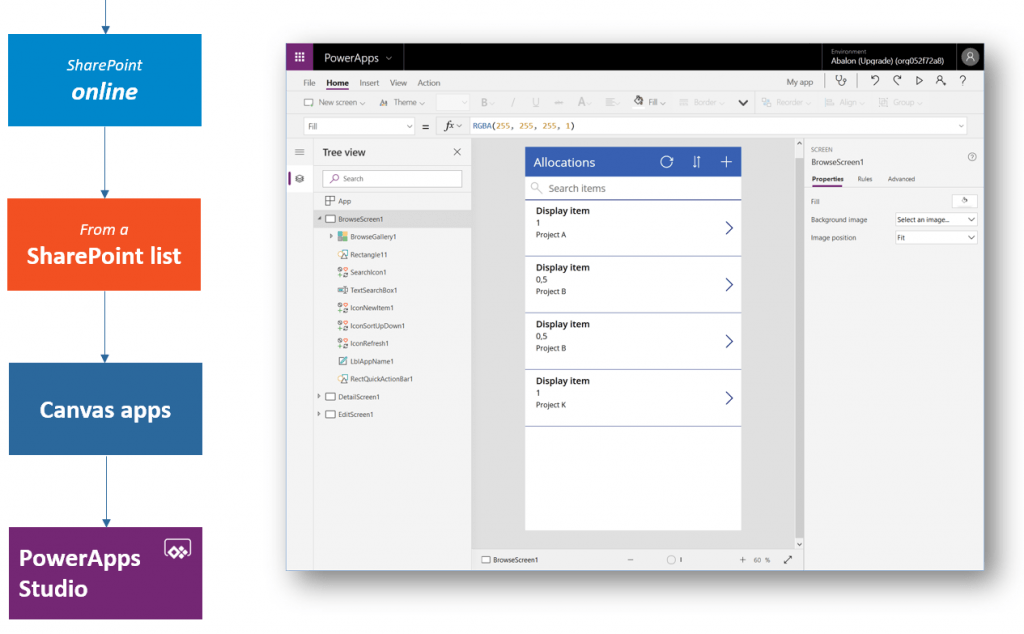
                    Keep in mind that these are just the default choices. They hide a much wider set of available options, configurations, and architectural choices that PowerApps provides. Without further ado, let’s take a more in-depth look!

                    Step 1: Select Your PowerApps Environment

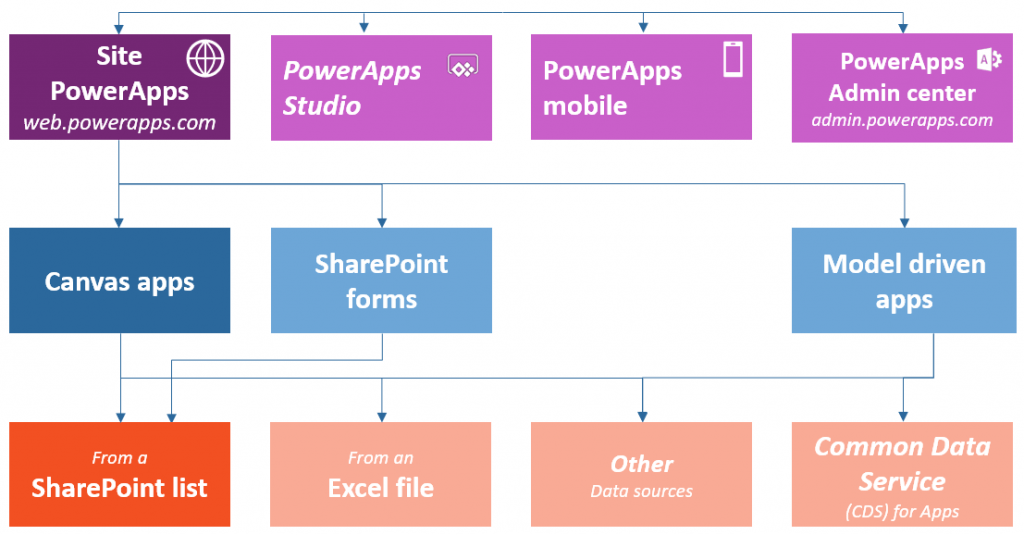
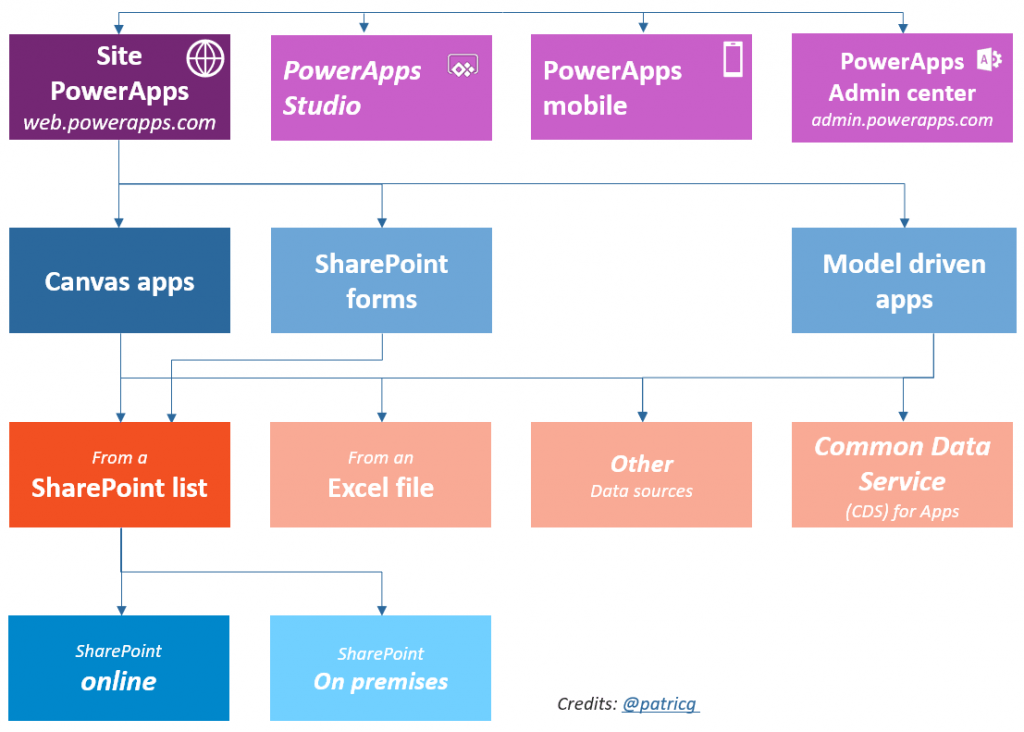
                    There are four tools or environments that you can work within PowerApps, and they each have their own capabilities and roles.

                    PowerApps Website

                    The website is where you’ll begin your PowerApps service journey. This is where you will be able to create a new app and to manage existing ones.
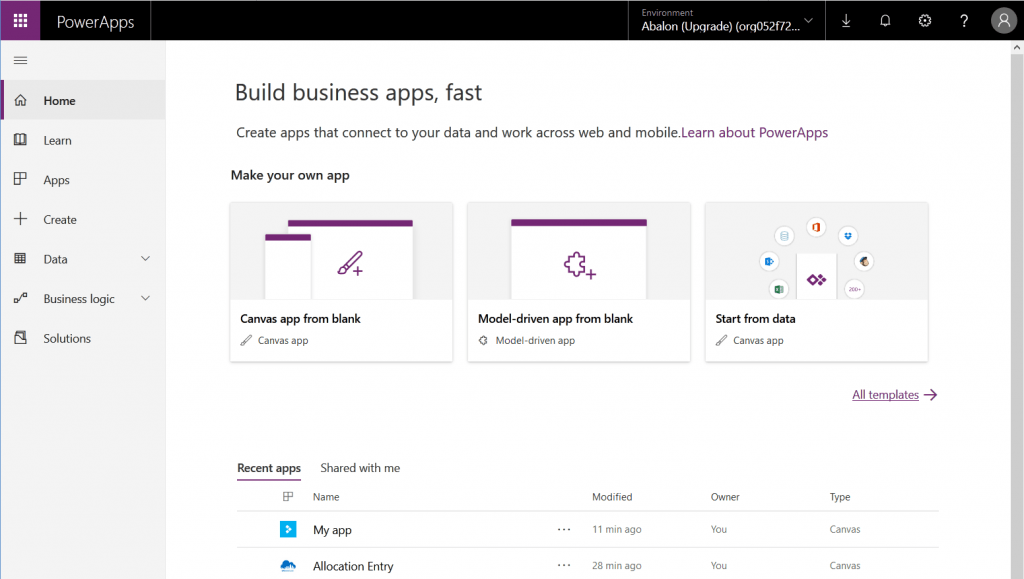
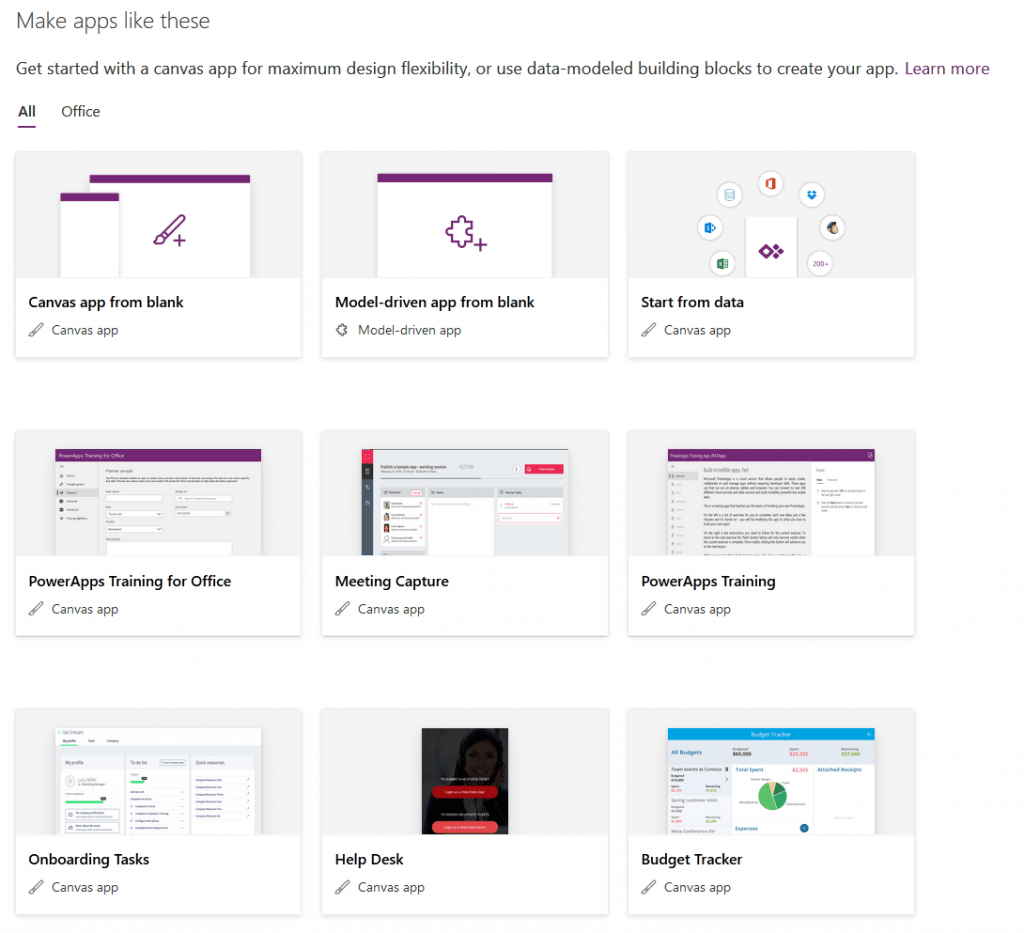
                    Here’s a small snapshot of some of the templates that might give you some usage ideas for the app:
                    PowerApps Studio

                    Here you’ll be able to design and adapt apps that you create to your specific business needs!
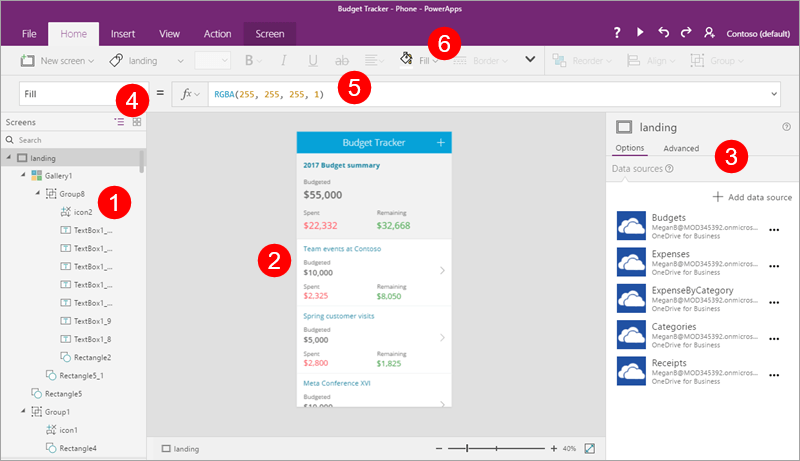
                    PowerApps Studio contains three panes and a ribbon that help make app creation feel similar to creating a slide deck in PowerPoint. Source: Quick review of PowerApps Studio
                    PowerApps Mobile App

                    This handy mobile app is available on both phones (iOSAndroid) and tablets (Windows 10). No matter the platform, the app provides a runtime environment where you’ll be able to execute all of your PowerApps apps. This includes the ones that were shared with you as well as the ones you designed and coded yourself.
                    PowerApps Admin Center

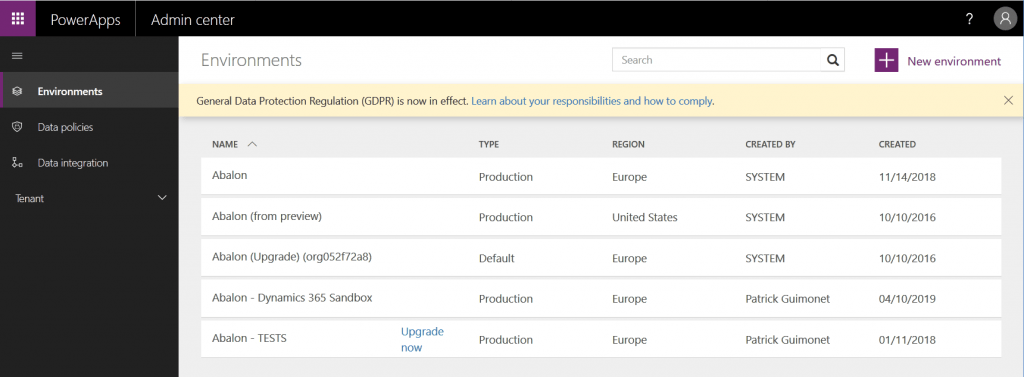
                    Admin.powerapps.com gives you the power to create and manage environments, DLP (Data Loss Prevention) strategies and user roles. You can get a list of user licenses in the tenant.

                    Step 2: Select Your PowerApps Application Type

                    There are two main types of apps you can create with PowerApps:

                    • Canvas apps
                    • Model-driven apps

                    Canvas apps enable you to organize freely and easily interface by positioning controls and fields in a “pixel-perfect” user experience. The main focus here is bringing your business knowledge and creativity to the app’s design. Canvas apps target lightweight apps or even disposable apps that can be designed and used in minutes.

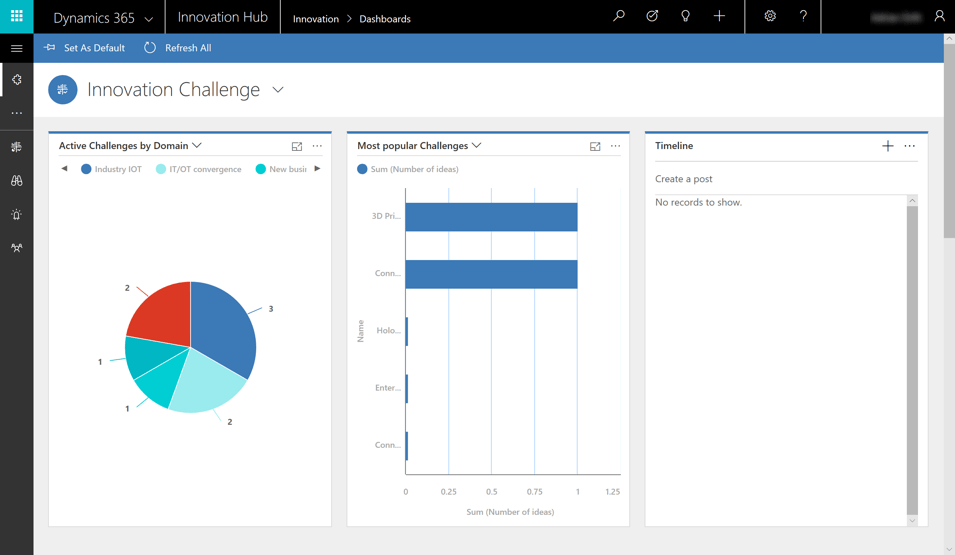
                    Model-driven apps are built on top of the Common Data Services used to help rapidly build forms, processes, and business rules. They focus on targeting heavier apps that are intended to be used intensively (multiple hours at a time).
                    powerapps

                    When working with model-driven apps, a good amount of the layout is determined for you and mostly designated by the components you add to the app. By contrast, the designer has complete control over the app layout in canvas app development.
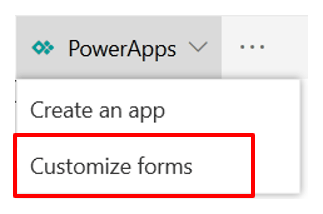
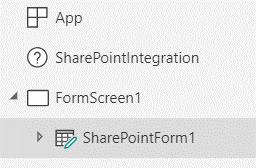
                    There’s also technically a “third” type of app that’s a specific version of Canvas: SharePoint list customized forms. From a SharePoint list, you can leverage PowerApps to customize the standard SharePoint form. After pulling up the “customize forms” menu, you would then get access to one specific component in your PowerApps called “SharePointIntegration.”

                    Need a quick primer on PowerApps? This post is pretty thorough:CLICK TO TWEET

                    This control is responsible for communicating user actions between PowerApps and SharePoint. It adds several properties like “OnNew,” “OnSave,” and “OnEdit” which provide ways for the app to respond when a user clicks or taps the “New” button, taps an item, or taps the “Edit All” button.
                    Step 3: Select Your Storage Type

                    Power Platform and specifically PowerApps target a world where data is king and the foundation of any business process. Thus, choosing the correct data sources is very impactful when it comes to designing an app.

                    Data are stored in a data source and you import them in your app by creating a connection.
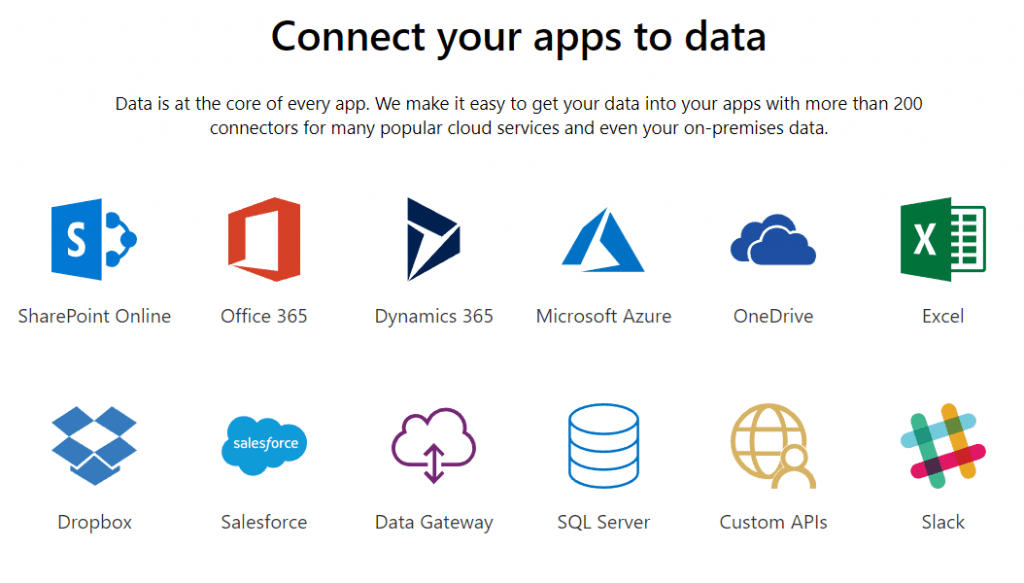
                    SharePoint lists and Excel spreadsheets are typically some of the most usual data sources, but there are also more than 200 data connectors available. PowerApps share connectors with Flow and Logic apps (the Azure service on top of which Flow is built). One of the great strengths of the platform is to provide connectors towards Microsoft worldOffice 365, SQL Server, Azure, etc., as well as towards external data sources like Salesforce, Dropbox, and Google Drive.

                    In PowerApps, a connector can provide data tables, actions, or both. Here’s for example of how a data source to a “Lessons” table can be used in PowerApps:

                    An action will have to be manually connected to a control to be executed:

                    For more, here’s an Overview of canvas-app connectors for PowerApps.

                    Be aware that the choice of data sources will have an impact on licenses needed to create and execute your app. If you choose or need a Premium source (like Salesforce or Common Data Service) you’ll need a PowerApps P1 or P2 license.
                    Step 4: Connect Your App to an Online or On-Premises Data Source

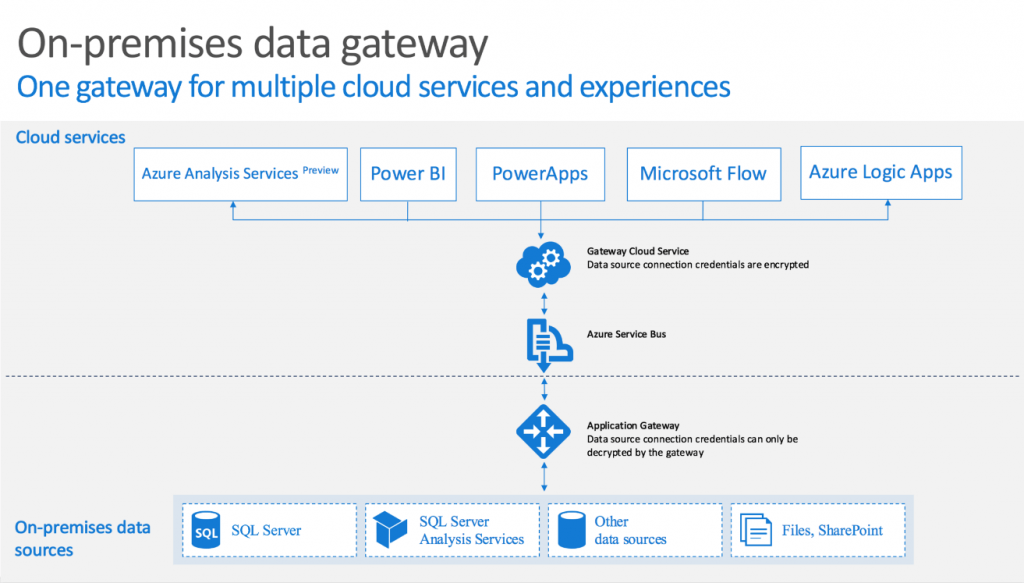
                    PowerApps is born in the cloud and can natively connect to cloud data sources. That said, it can connect to on-premises data sources as well. For that to happen you should configure an on-premises data gateway. This gateway is shared between several cloud apps like all the Power Platform (Power BI, Flow, PowerApps), Azure Analysis Services, and Azure Logic Apps.
                    powerapps

                    At the time of writing, supported data sources by the gateway are:

                    • SharePoint
                    • Oracle
                    • SQL Server
                    • Filesystem
                    • DB2
                    • Informix

                    Detailed instructions on how to configure and manage the gateway are available here.

                    Be aware that using on-premises data sources will have an impact on licenses needed to create and execute your app. If you choose or need a local data source, you will need PowerApps P1 or P2 license.

                    For all licensing information, you should have a look at:

                    Here’s hoping these elements will allow you to design better PowerApps for solving your business’ needs.

                    Create a business rule for a table

                    Leave a Comment

                     You can create business rules and recommendations to apply logic and validations without writing code or creating plug-ins. Business rules provide a simple interface to implement and maintain fast-changing and commonly used rules.

                     Important

                    Business rules defined for a table apply to both canvas apps and model-driven apps if the table is used in the app. Not all business rule actions are available on canvas apps at this time. More information: Differences between canvas and model-driven apps

                    Business rules don’t work with multi-select choices.

                    To define a business rule that applies to a form in a model-driven app, see Create business rules to apply logic in a model-driven app form.

                    By combining conditions and actions, you can do any of the following with business rules:

                    • Set column values
                    • Clear column values
                    • Set column requirement levels
                    • Show or hide columns
                    • Enable or disable columns
                    • Validate data and show error messages
                    • Create business recommendations based on business intelligence.

                    Differences between canvas and model-driven apps

                    Model driven apps can use all actions available on business rules, however not all business rule actions are available for canvas apps at this time. The following actions are not available on Canvas apps :

                    • Show or hide columns
                    • Enable or disable columns
                    • Create business recommendations based on business intelligence.

                    Prerequisites

                    To follow this topic, you must switch to an environment in which you can create and edit tables.

                    Create a business rule

                    1. Sign in to Power Apps, and then click or tap the down arrow for Data near the left edge.

                    2. In the list that appears, click or tap Tables.

                    3. Open the table you want to create the business rule for (for example, open the Account table), and then click the Business Rules tab.

                    4. Click New.

                      The Business Rule designer window opens with a single condition already created for you. Every rule starts with a condition. The business rule takes one or more actions based on that condition.

                       Tip

                      If you want to modify an existing business rule, you must deactivate it before you can modify it.

                    5. Add a description, if you want, in the description box in the upper-left corner of the window.

                    6. Set the scope, according to the following:

                      TABLE 1
                      If you select this item...The scope is set to...
                      tableModel Driven forms and server
                      All FormsModel Driven forms
                      Specific form (Account form, for example)Just that Model Driven form

                       Tip

                      If you're building a Canvas app, you must use table as the scope.

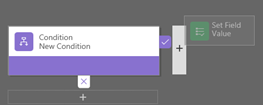
                    7. Add conditions. To add more conditions to your business rule:

                      1. Drag the Condition component from the Components tab to a plus sign in the designer.

                        Add a condition in a business rule.

                      2. To set properties for the condition, click the Condition component in the designer window, and then set the properties in the Properties tab on the right side of the screen. As you set properties, the Microsoft Dataverse creates an expression at the bottom of the Properties tab.

                      3. To add an additional clause (an AND or OR) to the condition, click New in the Properties tab to create a new rule, and then set the properties for that rule. In the Rule Logic column, you can specify whether to add the new rule as an AND or an OR.

                        Add a new rule to a condition.

                      4. When you're done setting properties for the condition, click Apply.

                    8. Add actions. To add an action:

                      1. Drag one of the action components from the Components tab to a plus sign next to Condition component. Drag the action to a plus sign next to a check mark if you want the business rule to take that action when the condition is met, or to a plus sign next to an x if you want the business rule to take that action if the condition is not met.

                        Drag an action to a business rule.

                      2. To set properties for the action, click the Action component in the designer window, and then set the properties in the Properties tab.

                      3. When you're done setting properties, click Apply.

                    9. Add a business recommendation. (Model Driven only) To add a business recommendation:

                      1. Drag the Recommendation component from the Components tab to a plus sign next to a Condition component. Drag the Recommendation component to a plus sign next to a check mark if you want the business rule to take that action when the condition is met, or to a plus sign next to an x if you want the business rule to take that action if the condition is not met.

                      2. To set properties for the recommendation, click the Recommendation component in the designer window, and then set the properties in the Properties tab.

                      3. To add more actions to the recommendation, drag them from the Components tab, and then set properties for each action in the Properties tab.

                         Note

                        When you create a recommendation, the Dataverse adds a single action by default. To see all the actions in a recommendation, click Details on the Recommendation component.

                      4. When you're done setting properties, click Apply.

                    10. To validate the business rule, click Validate on the action bar.

                    11. To save the business rule, click Save on the action bar.

                    12. To activate the business rule, select it in the Solution Explorer window, and then click Activate. You can't activate the business rule from the designer window.

                       Tip

                      Here are a few tips to keep in mind as you work on business rules in the designer window:

                      • To take a snapshot of everything in the Business Rule window, click Snapshot on the action bar. This is useful, for example, if you want to share and get comments on the business rule from a team member.
                      • Use the mini-map to navigate quickly to different parts of the process. This is useful when you have a complicated process that scrolls off the screen.
                      • As you add conditions, Actions, and business recommendations to your business rule, Dataverse builds the code for the business rule at the bottom of the designer window. This code is read only.

                    Localize error messages used in business rules

                    If you have more than one language provisioned for your organization, you will want to localize any error messages that you have set. Each time you set a message, a label is generated by the system. If you export the translations in your organization, you can add localized versions of your messages and then import those labels back into the Dataverse, so that people using languages other than your base language can view the translated messages.

                    Common issues

                    This section describes common issues that may occur when you use business rules.

                    Composite attributes not supported with Unified Interface apps

                    Actions or conditions that use Composite attributes are not supported in apps based on the Unified Interface. Alternatively, you can use actions or conditions on the attributes that comprise the composite attributes. For example, instead of using the Full Name (fullname) attribute, you can use the First Name (firstname) and Last Name (lastname) attributes.

                    Is your business rule not firing for a form?

                    A business rule may not execute because the field referenced in the business rule isn’t included with the form.

                    1. Open solution explorer. Expand the entity that you want and then select Forms.

                    2. Open the form that you want and then on the form designer ribbon select Business Rules.

                    3. In the form designer, open the business rule.

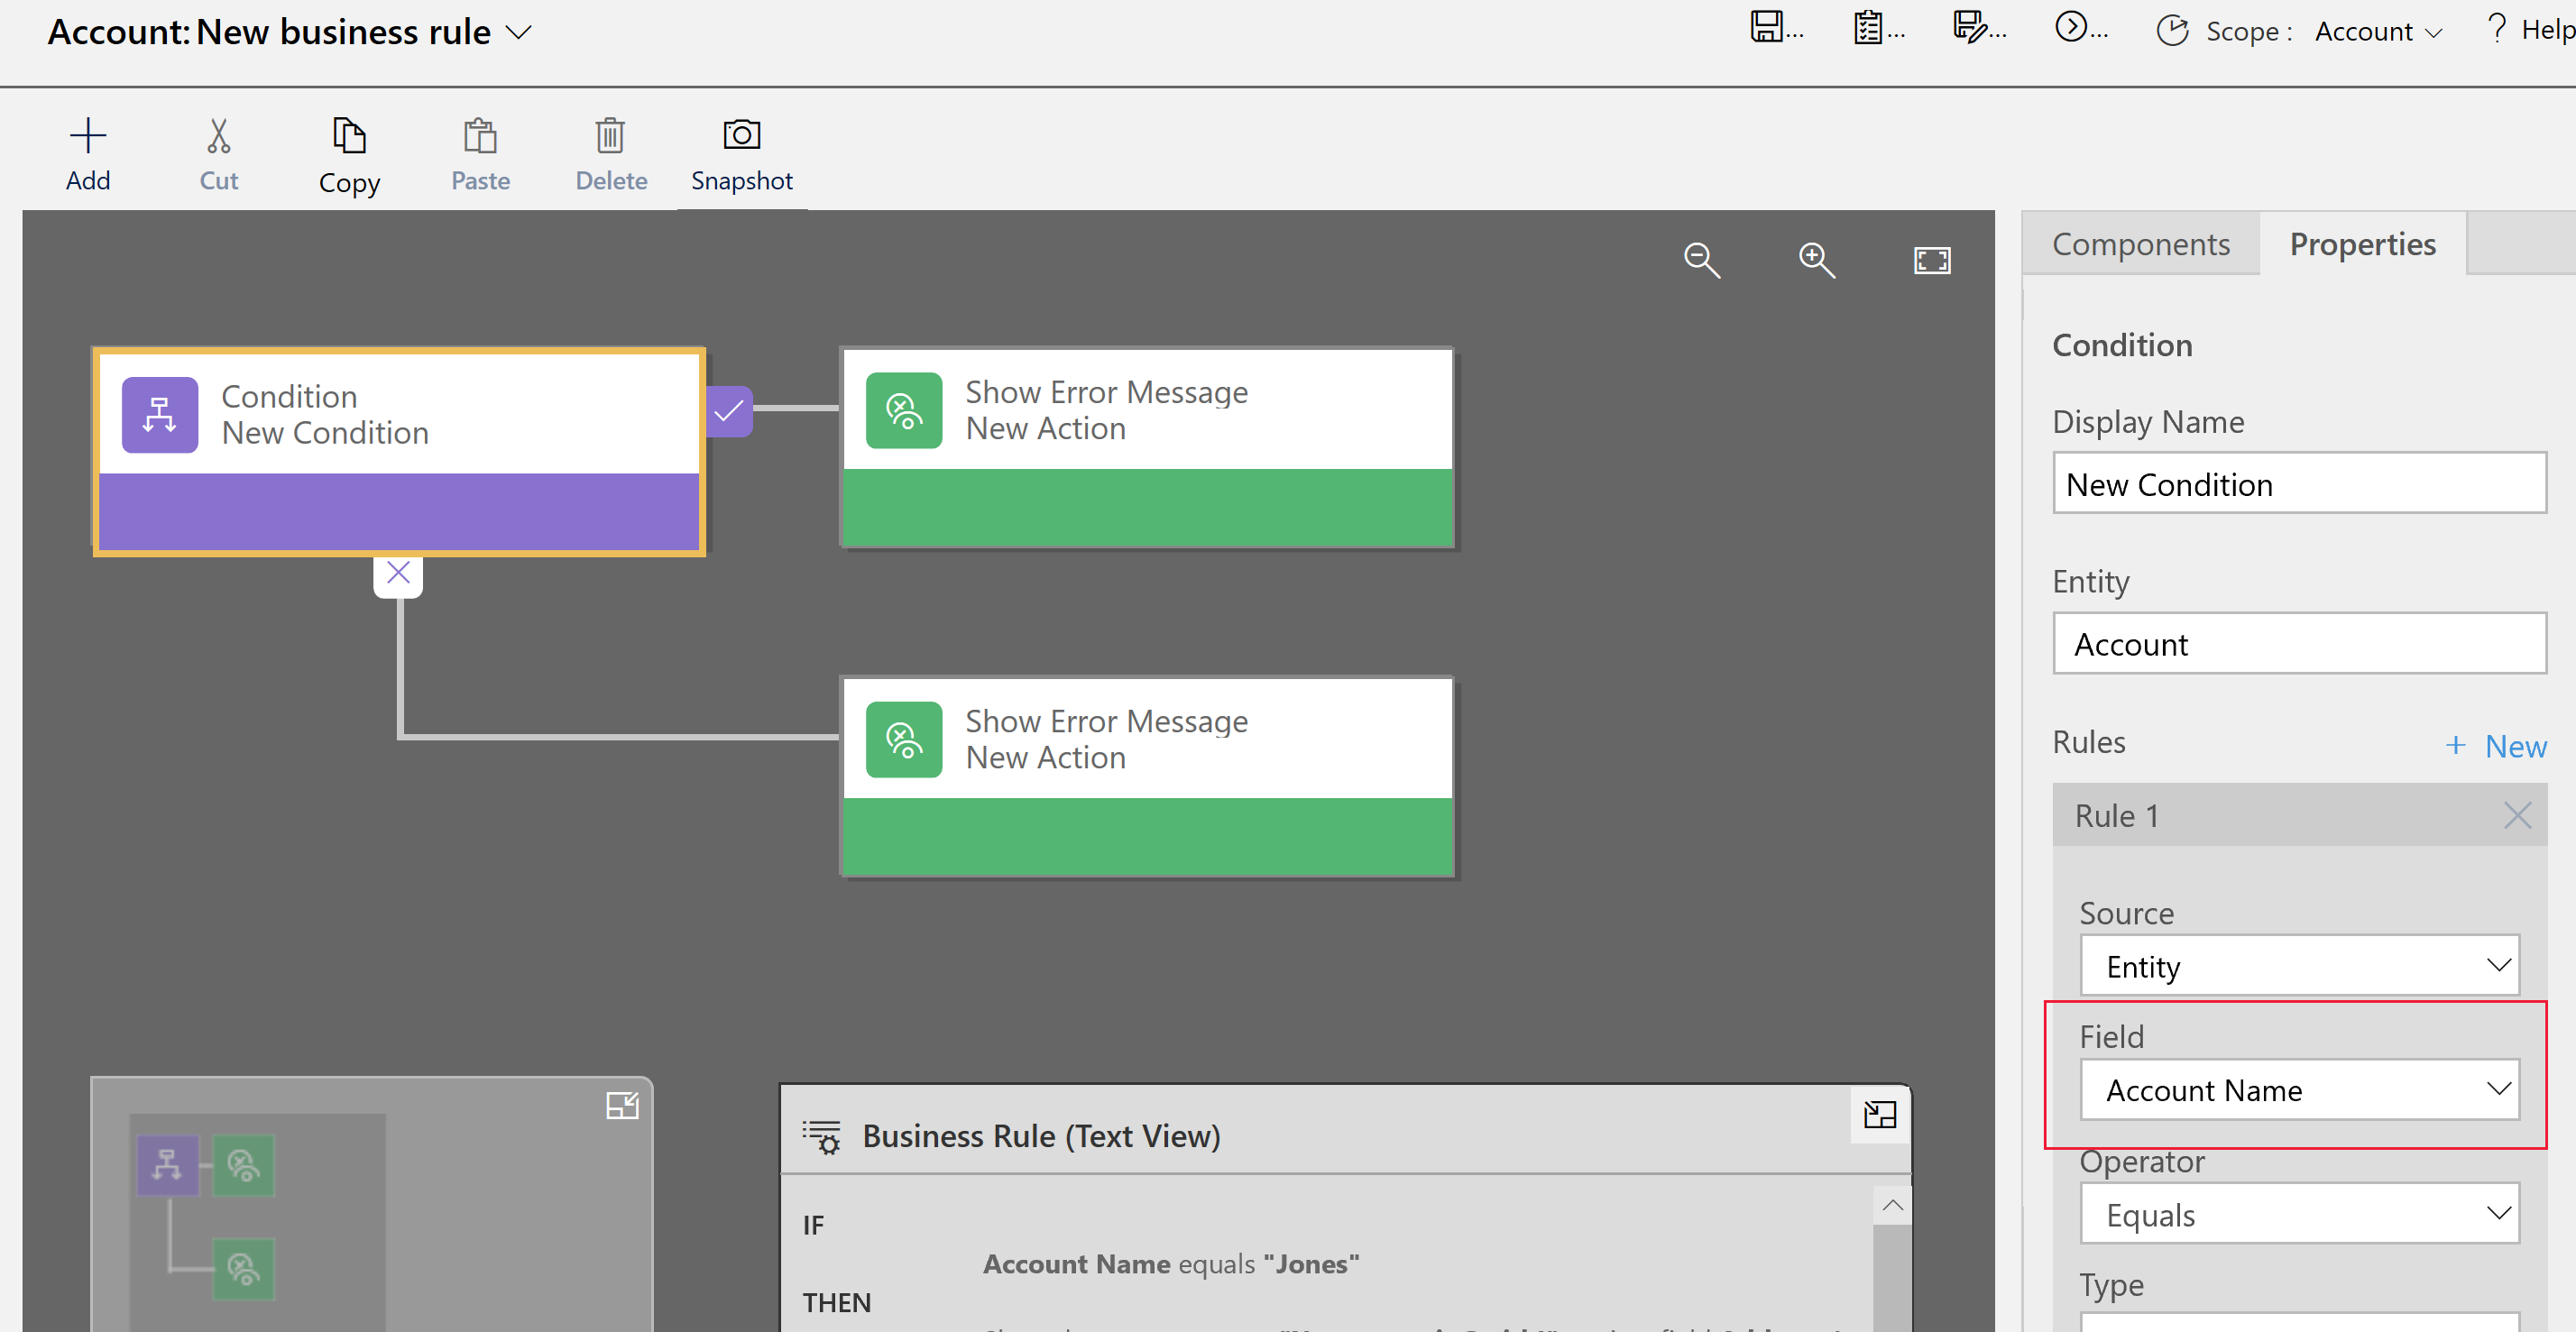
                    4. In the business rule designer select each condition and action to verify all the fields referenced in each condition and action.

                      Field referenced in business rule exists in entity.

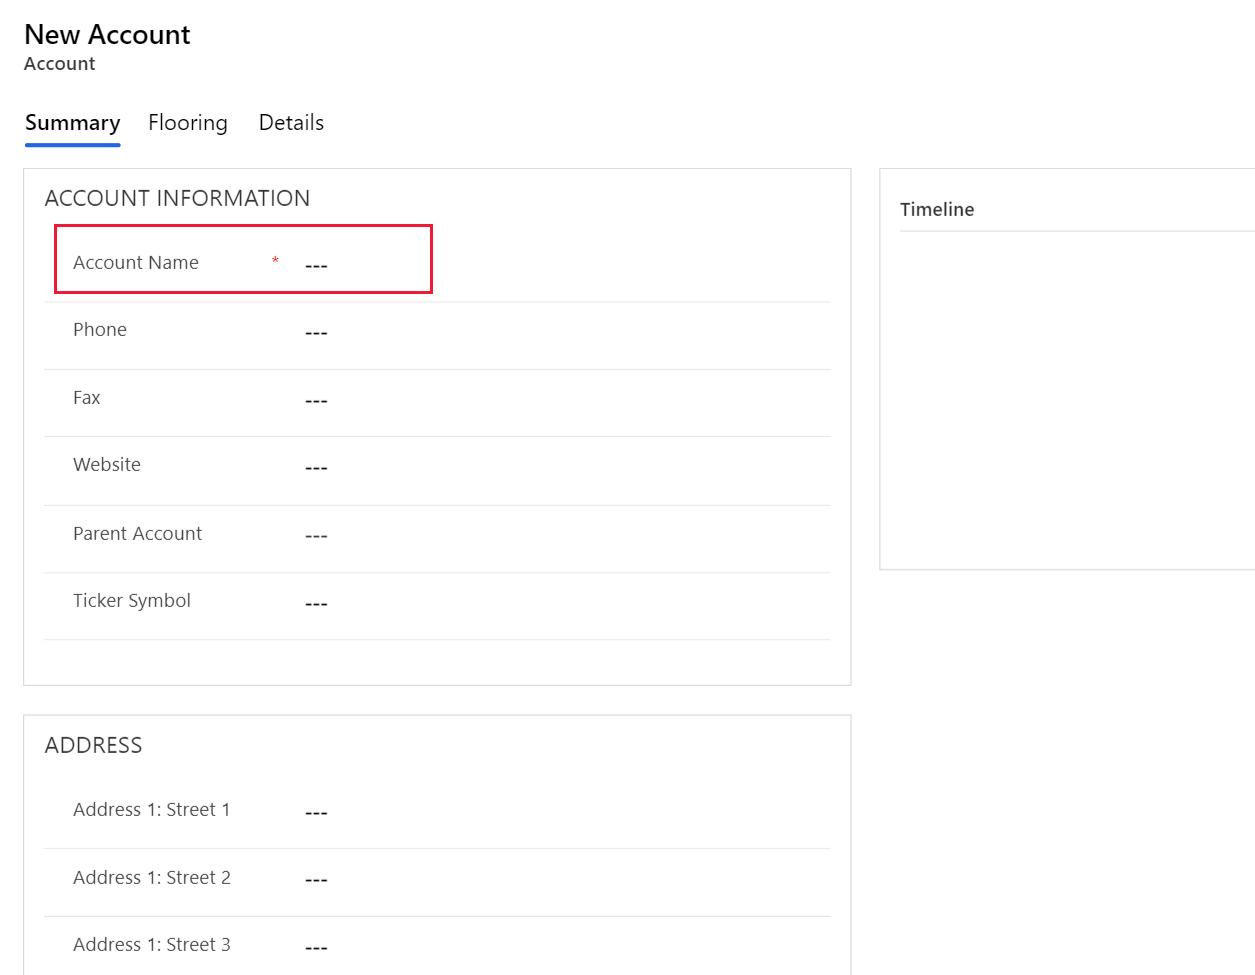
                    5. Verify that each field referenced in the business rule is also included on the form. If not, add the missing field to the form.

                      Account name field on form.

                    Frequently asked questions (FAQ)

                    Can business rules unlock fields on a read-only form?

                    • Yes, a business rule can unlock fields and edit actions on a read-only form.

                    How do I troubleshoot a business rule that isn't working?

                    Do business rules react to changes made by an onLoad script?

                    • No, they will execute before an onload script is executed.

                    When I update a business rule, is it executed against all existing records?

                    • No. Business rules are run on clients. For example, they run when a form is opened by a user and when a field value changes on that open form. They are not executed inside Dataverse.