As
the name suggest, Web API, an Application Programming Interface for Web.
In other words, it’s a framework which is used to create services aka
API’s which can be consumed by clients using browser or tablets or
mobile devices. Basically, it is used to create RESTful services. To
find more over REST, have a look into Difference between SOAP And REST APIs.
Whenever we consume an API, we receive data in either JSON or XML or
plain text or your own custom format. I.e. the requester and responder
are aware of the format in which they will receive data. This is nothing
but Content Negotiation in Web API 2.


Great!! Your application worked!! So now we are ready to deep-dive
into understanding Content Negotiation with examples. If you don’t wish
to download the POSTMAN application, then chrome provides an add-in for
the same.

Above fig is the landing page of postman application. It’s basically divided into 3 portions,

Test Case 1
As we didn’t specify the ACCEPT header, the server gave us back JSON
data, which is the default content-type for a response. Let us specify
the ACCEPT header. For this,
Note that whatever request we are making, it’s getting saved in the
History panel. We can anytime double click on the desired URL and check
our past test case result.
Test case 3
Test Case 4
Test case 5

Similarly to get data in only XML format, below is the code.
How Content Negotiation Works
There are two main headers which hold the responsibility of content negotiation- Content-Type
- Accept

Default Content Negotiator
In the above pictorial view, there are few points which should be noted down,- User 2 didn’t mention Content-Type but then received the response in desired format. I.e. XML.
- Whereas User 4 didn’t mention both Content-Type as well as
Accept header. But then received the response. I.e. in JSON format. In
short, JSON format is the default content negotiator in web api 2.
- Also, User 3 requires data in text/html format but receives
data in XML format. In short, text/html Accept header sends response in
XML format by default.
Till now, we had lots of theory. Let’s see the above pictorial view in .Net platform.
Creating Web API Application in .NET
Let’s create a Web API 2 application for understanding Content Negotiation. I will be creating the project using.- Visual Studio 2017
- Entity Framework 6
- SQL Server 2012 – I have used Adventure Works sample Database – Go through
https://www.tutorialgateway.org/download-and-install-adventureworks-database/to download and bind the SQL database
- In Visual Studio 2017, select File > New>Project> Asp.Net Web Application (.Net Framework)
- Choose the desired path, project name and .Net Framework
4.6.1. As a FYI, .Net Framework 4.5 and above supports Web API2
features. Click OK

- In this step, you will get the list of templates supported
by .Net framework 4.6.1. For this tutorial, I am selecting Web API.
Please note, the MVC and Web API checkboxes are checked by default.
Click ok.

- In few minutes, your Web API project will be created with a default project structure and a controller to begin with.

- Now let us bind our Adventure works database. I will be
using Entity Framework Database first approach. For this, right-click on
your Models folder> Add > New Item> ADO.Net Entity Data Model.
Give name to your .edmx file and click Add.
- Now select EF designer from database. Click Next > Select
the connection string if existing else click on New connection &
create the connection string. Once done click ok and then next.
- Here in visual studio 2017, you get an option to select version of EF. I will be selecting Entity Framework 6.x. Click Next

- Select the desired Tables, View or Store procedure. I will
go ahead only with Product Table. Click Finish. In sometime, your .edmx
file will be created with Product Entity.
- Now let’s create a web api Products Controller. Right-click
on Controllers folder > Add> New Scaffolder item > Web API 2
with actions using Entity Framework > Click Add.
- Select the desired Model class, DataContext class and
Controller name > Click Add. A controller with pre-written Actions
will be created.

- Run the application and in your browser, write api/Products after the localhost. You will get your data in XML Format.


Downloading and Installing Postman
For testing the Web API, you can either use fiddler or postman. Here I will be using Postman. You can download and install the same from,https://www.getpostman.com/appsLet’s
check if the application is running in POSTMAN. Copy the URL from
browser and paste it beside the GET button and click SEND. You will
receive the desired data long with repose status code.
https://chrome.google.com/webstore/detail/postman/fhbjgbiflinjbdggehcddcbncdddomop?hl=enI personally prefer using the application so I have downloaded and installed it.OVERVIEW OF POSTMAN
After building a web API or service application, we all would like to test them without consuming it. For such purpose, Fiddler and Postman are being used. I will go ahead and give small overview about Postman before testing our application. Postman provides a wide range of features for our use. It has made a developer life quite easy. One of them is we can easily create an account in Postman so that if in case we want to save our test cases for future use. What a relief!!
- Request Panel : where you note down the details you wish to send to the server.
- Response Panel : where you can see the data you requested for.
- History Panel : this will list down the entire service request you made each day.
You can go throughhttps://www.youtube.com/watch?v=FjgYtQK_zLEto understand more functionality postman offers. Now let us see how we can request the service and how we receive response from the server.
Testing Content Negotiation or WebApi with Postman
As we all know, there are 4 types of operation or HTTP verbs we can perform,- GET
- PUT
- POST
- DELETE
GET REQUEST
This request is used when we simply want to receive data from server. So for me, I need a list of all the products.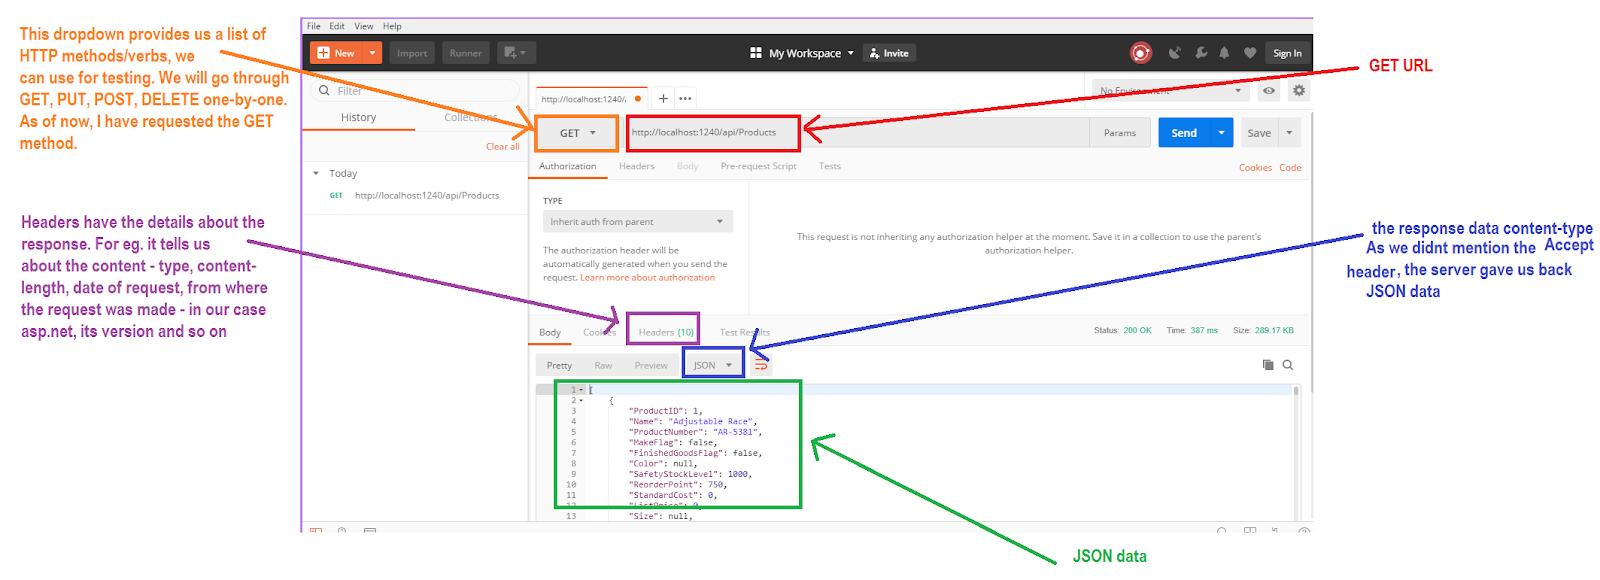
- Click on headers tab in request panel
- Enter ACCEPT under key in first row and value as application/XML.
- Click Send
Now we get the response body as XML. Similarly we can request data in other formats like text, json, xml and so on.


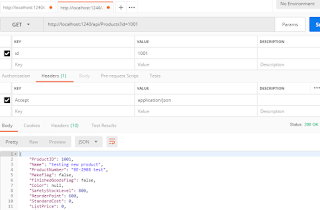
- Send the product id value with the URL. For example,
http://localhost:1240/api/Products/4
- Set a parameter and make a call to
http://localhost:1240/api/Products
We will try the second option. For this,
- click on the Params button beside the send button
- Enter id as key and 4 as value
- Specify the Accept header if any and click send


PUT Method
If we want to update any existing data, we use the PUT method.Test case 3
- click on the Params button beside the send button
- Enter id as key and 4 as value
- Now as we need to send the data which we need to update, we
have to tell server what is the format of the input data. So we specify
Content-Type.
- Specify the Accept header if any
- Change the HTTP verb to PUT
- In body tab, enter the JSON input data and click send

Ooopzz!! We receive no data in our response panel with a status of ‘ 204 No Content’.

So isn’t our data updated? To check if our data is updated, repeat Test case 2. You can see the changes. But we would like to get the data back immediately after hitting the URL instead of repeating the Testcase 2. For this, we need to update few small line in our PUT action method.
- Replace
- [ResponseType(typeof(void))] with [ResponseType(typeof(Product))]
- Replace
Save and Run your application. Repeat Test Case 4. In PUT as well, we can shuffle around content-type and Accept headers as per our need.- return StatusCode(HttpStatusCode.NoContent); with
- Product product1 = db.Products.Find(id);
- return Ok(product1);


POST Method
Is use to create new data in database. Steps to create the scenario are similar to Testcase 3. Only difference, we are not supposed to send any Id as input.Test Case 4
- As we need to send the data which we need to update, we have to
tell server what is the format of the input data. So we specify
Content-Type.
- Specify the Accept header if any
- Change the HTTP verb to POST
- In body tab, enter the JSON input data and click send


DELETE Method
As the name says, use to delete an existing data.Test case 5
- click on the Params button beside the send button
- Enter id as key and 1001 as value
- Now as we need to send the data which we need to update, we
have to tell server what is the format of the input data. So we specify
Content-Type.
- Specify the Accept header if any
- Change the HTTP verb to DELETE
- Click Send.
As a response we get back the Product details which we delete. So repeat TestCase 2 and now we see no data with a status code ‘Not Found’.
Bounding WebAPI to send only json or xml formatted data
Now there are cases where we want our application to receive only JSON or XML formatted data irrespective of the ACCEPT header value. To achieve this, add a below line in App_Start > WebApiConfig.cs> Register method.This will remove the XML formatter and always return JSON data. I executed TestCase 1 with Accept header as application/xml.
- config.Formatters.Remove(config.Formatters.XmlFormatter);

- config.Formatters.Remove(config.Formatters.JsonFormatter);

Returning data based upon the accept header
For this purpose, add the below line of code in App_Start> WebApiConfig.cs> Register method
- config.Formatters.JsonFormatter.SupportedMediaTypes.Add(new System.Net.Http.Headers.MediaTypeHeaderValue("text/html"));
Summary
Content-Type and Accept header are the important elements while requesting a service. It tells the service in which format he will be receiving the input and in which format he needs to send the data back respectively. If you are making an Ajax call, below is the basic structureWhere, dataType is the ACCEPT header value. Data is the input data you sending to the server.
- $.ajax({
- url: "http://localhost:1240/api/Products",
- dataType: "application/xml",
- contentType: "application/json; charset=utf-8",
- data: JSON.stringify(inputdata),
- success: function(result) { },
- });


