A comprehensive getting started tutorial on building Android and iOS app from scratch using React Native. In this tutorial, we are creating an app that listing the World Cup 2018 matches using the free open public domain football data for the world cups in the JSON format.
The following tools, frameworks, and modules are required for this tutorial:
- React Native
- Node.js (NPM or Yarn)
- Android Studio or SDK for Android
- XCode for iOS
- Terminal (OSX/Linux) or Command Line (Windows)
- Text Editor or IDE (We are using Atom)
- Node.js (NPM or Yarn)
- Android Studio or SDK for Android
- XCode for iOS
- Terminal (OSX/Linux) or Command Line (Windows)
- Text Editor or IDE (We are using Atom)
Before start to the main steps, make sure that you have installed Node.js and can run `npm` in the terminal or command line. To check existing or installed Node.js environment open the terminal/command line then type this command.
node -v
v8.11.1
npm -v
6.1.0
yarn -v
1.7.0
That's the Node and NPM or YARN version that we are using. In this tutorial, we will use Yarn commonly.
1. Install React App Creator and Create A React Native App
The Create React Native App is a tool for creating a React Native App. To install it, type this command in your App projects folder.
sudo npm install -g create-react-native-app
Then create a React Native App using this command.
create-react-native-app reactWorldCupApp
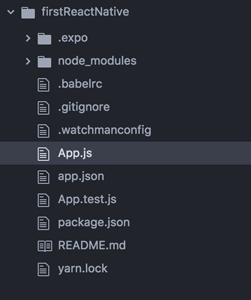
That command will create a React Native app then install all required modules. The app or project folder will contain this folders and files.
Next, go to the newly created React App folder.
cd reactWorldCupApp
This React Native App is running via Expo app, before running on your Android or iOS device, make sure you have to install Expo App to Android or Expo Client to iOS. Of course, that app is available in the App Store. So, we assume that you have installed Expo App in your device then type this command to run the app.
npm start
or
yarn start
You will see this barcode and instruction in the terminal or command line.
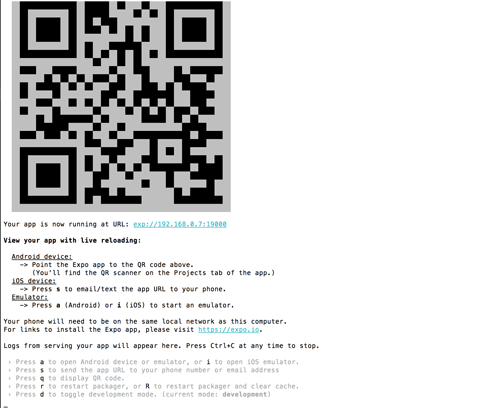
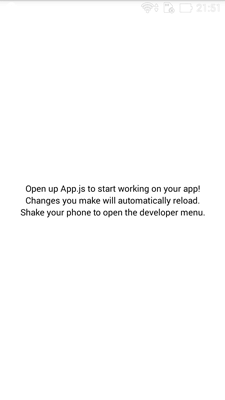
To open the app in the Android device, open the Expo App first then tap on Scan QR Code button. Scan the barcode in the terminal or command line then you will see the React Native Android App like this after waiting for minutes the build process.
For iOS Device, press `s` from the keyboard to send React Native App URL to your Email or SMS. Enter your phone number or Email address (We use email address) then press Enter. You will get this email to your mailbox.
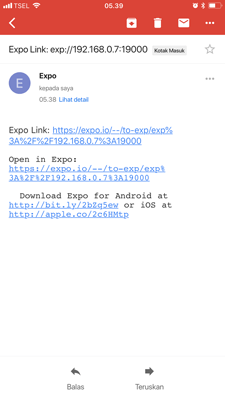
Choose open in Expo URL then open in your browser, that will be redirected to Expo App. In Expo App welcome screen, shake your phone to open the React Native App. Now, you will see this screen in your iOS device.
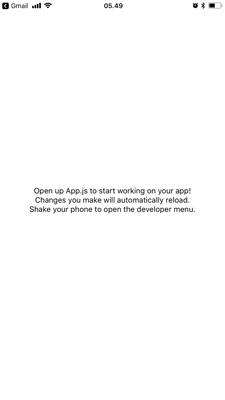
This step for development purpose, we will show you how to build for production at the end of this article.
2. Add Navigation Header and Home Screen
Above generated React Native App just show blank app with plain text. Now, we will show you how to add Navigation Header and Home Screen for your app. So, it will look like the Native App. In the terminal or command line type this command to install React Navigation module.
yarn add react-navigation
Next, create a folder for components and components files in the root of the app folder.
mkdir components
touch components/HomeScreen.js
touch components/DetailsScreen.js
Open and edit `components/HomeScreen.js` then add this React codes.
import React, { Component } from 'react';
import { Button, View, Text } from 'react-native';

class HomeScreen extends Component {
  static navigationOptions = {
    title: 'Home',
  };
  render() {
    return (
      <View style={{ flex: 1, alignItems: 'center', justifyContent: 'center' }}>
        <Text>Home Screen</Text>
        <Button
          title="Go to Details"
          onPress={() => this.props.navigation.navigate('Details')}
        />
      </View>
    );
  }
}

export default HomeScreen;
Open and edit `components/DetailsScreen.js` then add this React codes.
import React, { Component } from 'react';
import { Button, View, Text } from 'react-native';

class DetailsScreen extends Component {
  static navigationOptions = {
    title: 'Details',
  };
  render() {
    return (
      <View style={{ flex: 1, alignItems: 'center', justifyContent: 'center' }}>
        <Text>Details Screen</Text>
        <Button
          title="Go to Details... again"
          onPress={() => this.props.navigation.push('Details')}
        />
        <Button
          title="Go to Home"
          onPress={() => this.props.navigation.navigate('Home')}
        />
        <Button
          title="Go back"
          onPress={() => this.props.navigation.goBack()}
        />
      </View>
    );
  }
}

export default DetailsScreen;
Next, open and edit `App.js` then add replace all codes with this.
import React from 'react';
import { StyleSheet, Text, View } from 'react-native';
import { createStackNavigator } from 'react-navigation';
import HomeScreen from './components/HomeScreen';
import DetailsScreen from './components/DetailsScreen';

const RootStack = createStackNavigator(
  {
    Home: HomeScreen,
    Details: DetailsScreen,
  },
  {
    initialRouteName: 'Home',
    navigationOptions: {
      headerStyle: {
        backgroundColor: '#f4511e',
      },
      headerTintColor: '#fff',
      headerTitleStyle: {
        fontWeight: 'bold',
      },
    },
  },
);

export default class App extends React.Component {
  render() {
    return <RootStack />;
  }
}
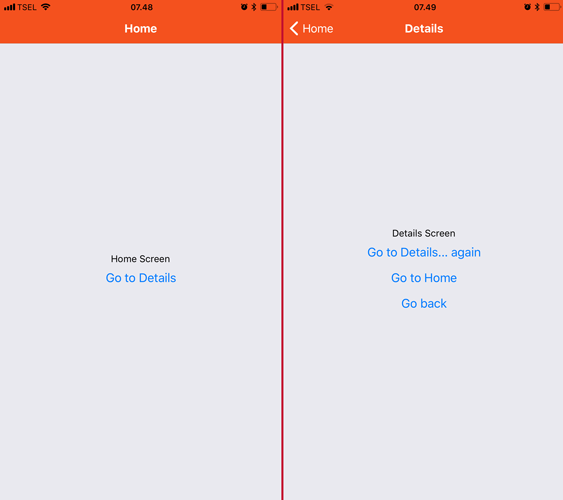
When the files are saved, the Expo app will refresh the React Native App automatically. Now, the app will look like this.
3. Load World Cup 2018 Data from API
To load World Cup 2018 data from API, open and edit `components/HomeScreen.js` then add constructor function before rendering function.
constructor(props){
  super(props);
  this.state ={ isLoading: true}
}
Add function for load API JSON data.
componentDidMount(){
  return fetch('https://raw.githubusercontent.com/openfootball/world-cup.json/master/2018/worldcup.json')
    .then((response) => response.json())
    .then((responseJson) => {
      // console.log(responseJson);
      this.setState({
        isLoading: false,
        dataSource: responseJson.rounds,
      }, function(){

      });

    })
    .catch((error) =>{
      console.error(error);
    });
}
The response from API holds by `dataSource` variable that will use in the view in the next step.
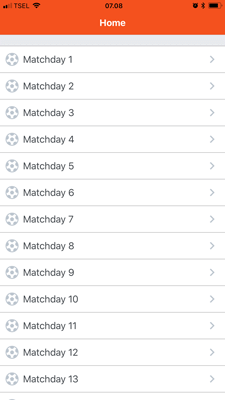
4. Display List of World Cup Matchdays
We will use List and ListItem component of React Native Elements module. First, install `react-native-elements` using this command.
yarn add react-native-elements
Open and edit again `components/HomeScreen.js` then replace all imports with this.
import React, { Component } from 'react';
import { StyleSheet, ScrollView, ActivityIndicator, Text, View  } from 'react-native';
import { List, ListItem } from 'react-native-elements';
Next, replace all render function with this.
render() {
  if(this.state.isLoading){
    return(
      <View style={styles.activity}>
        <ActivityIndicator/>
      </View>
    )
  }

  return(
    <ScrollView style={styles.container}>
      <List>
        {
          this.state.dataSource.map((item, i) => (
            <ListItem
              key={i}
              title={item.name}
              leftIcon={{name: 'soccer-ball-o', type: 'font-awesome'}}
              onPress={() => {
                this.props.navigation.navigate('Details', {
                  matches: `${JSON.stringify(item.matches)}`,
                });
              }}
            />
          ))
        }
      </List>
    </ScrollView>
  );
}
Add style const before the export code.
const styles = StyleSheet.create({
  container: {
   flex: 1,
   paddingBottom: 22
  },
  item: {
    padding: 10,
    fontSize: 18,
    height: 44,
  },
  activity: {
    flex: 1,
    padding: 20,
  }
})
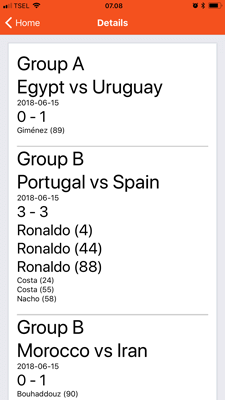
5. Display World Cup 2018 Matchdays Details
We will display World Cup 2018 Matchdays Details in the `DetailsScreen`. Open and edit `components/DetailsScreen.js` then replace all imports with this.
import React, { Component } from 'react';
import { StyleSheet, ScrollView, View } from 'react-native';
import { List, ListItem, Text, Card } from 'react-native-elements';
Next, replace all render function with this lines codes.
render() {
  const { navigation } = this.props;
  const matches = JSON.parse(navigation.getParam('matches', 'No matches found'));
  console.log(matches);

  return (
    <ScrollView>
      <Card style={styles.container}>
        {
          matches.map((item, key) => (
            <View key={key} style={styles.subContainer}>
              if(item.group) {
                <View>
                  <Text h3>{item.group}</Text>
                </View>
              }
              <View>
                <Text h3>{item.team1.name} vs {item.team2.name}</Text>
              </View>
              <View>
                <Text h5>{item.date}</Text>
              </View>
              <View>
                <Text h4>{item.score1} - {item.score2}</Text>
              </View>
              if(item.goals1.length > 0) {
                item.goals1.map((item2, key2) => (
                  <View key={key2}>
                    <Text h4>{item2.name} ({item2.minute})</Text>
                  </View>
                ))
              }
              if(item.goals2.length > 0) {
                item.goals2.map((item3, key3) => (
                  <View key={key3}>
                    <Text h5>{item3.name} ({item3.minute})</Text>
                  </View>
                ))
              }
            </View>
          ))
        }
      </Card>
    </ScrollView>
  );
}
Add StyleSheet const before the export code.
const styles = StyleSheet.create({
  container: {
    flex: 1,
    padding: 20
  },
  subContainer: {
    flex: 1,
    paddingBottom: 20,
    borderBottomWidth: 2,
    borderBottomColor: '#CCCCCC',
  }
})
6. Run the React Native World Cup 2018 App
To run the application in Expo App, you can find in step 1 of this article. If there's no error found, you will see the result like this.
Next, to run or build as the Native App, type this command to install React Native CLI first.
sudo npm install -g react-native-cli
Next, eject the project from the Create React Native App by type this command.
npm run eject
You will get questions like below, make it same with the one that we choose.
? How would you like to eject from create-react-native-app? React Native: I'd like a regular React Native project.
We have a couple of questions to ask you about how you'd like to name your app:
? What should your app appear as on a user's home screen? React World Cup
? What should your Android Studio and Xcode projects be called? ReactWorldCupApp
Next, to run the Native iOS or Android App in the Simulator, type this command.
react-native run-ios
react-native run-android
That it's for now. Any suggestions are open for next React Native tutorial. You can find full working source code in out GitHub.
Thanks!


